I found a really great way to make SolarPlate relief plates using paper stencils. For weeks I had been trying to develop a process that would allow me to make really crisp and clean relief plates with fine details. After many weeks of experimentation, I had managed to make a couple of excellent plates from negatives made out of glass covered with black adhesive vinyl. These negatives worked because the flat nature of the glass ensured perfect contact with the plate during exposure and the opaque black vinyl on the clear glass gave me super-high contrast.
While I was thrilled to be able to make these plates, I was a little disappointed because the process was complex and expensive and required lots of time with my mind outside of the artistic space as I scanned my artwork, adjusted it in Photoshop, converted edges to vectors in Illustrator, cut the vinyl with a Silhouette craft cutting machine, and transferred the vinyl to glass using special adhesive transfer paper. The plates were beautiful, but I felt like a technician and the process was stressful and riddled with opportunities for failure at every step.
My breakthrough came while touring the Nikki McClure exhibit at the Bellevue Arts Museum. Nikki specializes in papercut and the gallery was full of these beautiful, intricate works that looked just like prints, but were each cut from a single sheet of black paper. I realized that afternoon that I could dispense with the scanner, computer, and craft cutter if I picked up an X-ACTO knife and cut the paper by hand.
It wasn’t until I made my first plate from a paper stencil that I understood the true benefits of the approach. The paper stencils are great for reducing costs, but the approach really shines because it keeps me in the artistic space the entire time and the simplicity and fluidity of the process allows me to rapidly try out ideas and visualize the results as I go.
The reason it works so well is that paper is easy to cut and as I cut the negative I get a paper positive which gives me a pretty good idea of what the print will look like as I am working. I can easily rework an area or even cut a new piece if I make a mistake. With no risk of destroying the plate, I am free to try out different compositions, edge contours, and cutting styles – you name it – I can try it quickly and easily.
Then, once I get something I am really happy with, I can make a plate and I get to keep the positive to hang on the wall. The prints from the plate are hand-made original artist prints, but now I have this even more original, hand-made master stencil to admire. I also have the satisfaction of knowing that the entire process involved my direct touch instead of the cold hand of a computer.
An added benefit is that I don’t have to paint the original artwork. Don’t get me wrong – I really enjoy painting, but much of the emphasis in relief printmaking is on the edges of the shapes – not the interiors. When painting a flat image in gouache, some of the time goes into the edge work, but a lot of it is spent massing in the shapes. When cutting a paper stencil, you only pay for the edges and you get the masses of the shapes for free.
I think this approach has huge potential for learning design for printmaking – it teaches simplification and you can use it to prototype a multi-plate color print before going to the time and expense of creating the plates. Even if you are working in linoleum or wood block, it is nice to try out an intricate idea before committing.
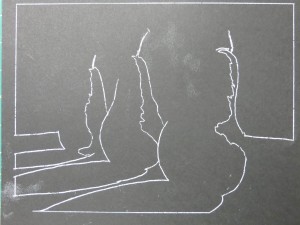
The first step is draw the image directly on black paper or copy it with transfer paper. I use a white chalk pencil or white transfer paper because it is easy to see, but graphite transfer paper has the advantage of not being as visible in case you want to clean up the positive stencil to save as another piece of original art. I used Strathmore Artagain paper because it is thin, making it easy to cut and smooth enough to give good contact with the plate during exposure.
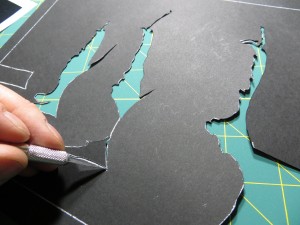
I use an X-ACTO knife to cut the stencil. This photo shows a knife that tightens at the bottom near the blade. The Gripster version of the knife that tightens at the top is much better for this sort of work because the blade won’t unscrew as the knife goes around sharp curves.
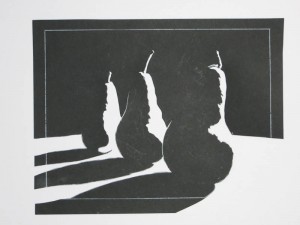
Cutting the stencil is a two-for-one proposition since you get the parts to make two stencils – one negative, and the other positive. The negative stencil is used to expose the plate. The positive stencil gives you a realtime preview of the final printed image, allowing you to make creative decisions as you cut. In the end you get a printing plate and a one-of-a-kind stencil suitable for framing.
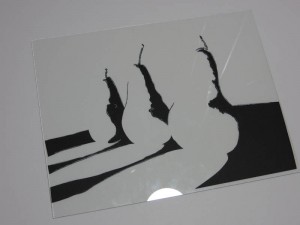
Once the stencil is cut, the negative portions are glued to a piece of glass using a gluestick. It is important to use a piece of glass that is slightly larger than your plate so that the edges of the glass don’t cast shadows on the plate during exposure. I use glass from inexpensive 8.5″ x 11″ document frames. You can get these frames for about $3 at places like Walmart.
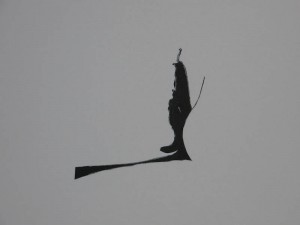
Another benefit of paper stencils is that you can recut individual portions of the negative if you make a mistake or just want to try another idea.
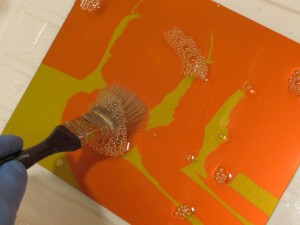
The last step is to expose and develop the plate. The stencil is perfectly flat and very high contrast, so it is easy to get a perfect exposure. Be sure that the paper-side of the glass is in contact with the plate during exposure.
