I love the negative space in this watercolor by Susan Booth Titus.

Cornfield, Susan Booth Titus

I love the negative space in this watercolor by Susan Booth Titus.
Cornfield, Susan Booth Titus
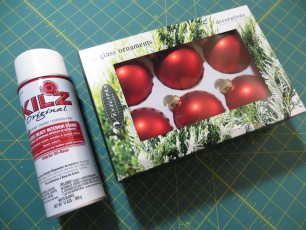
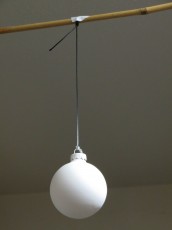
This week we started to render white spheres in charcoal. The timing couldn’t have been better because Christmas ornaments just went on sale at Bartells. Christmas ornaments make excellent drawing spheres because:
Here are some painting tips:

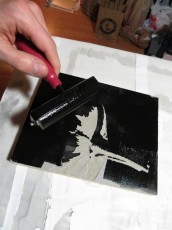
Today I experimented with papers designed specially for block printing and had much better success.

Better paper makes a world of difference.
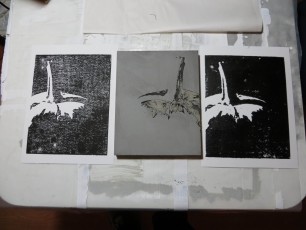
I used Dick Blick water soluble printing ink on five different papers. Here are the results:
Overall, it seems that thinner papers with a nappy surface work the best.

Five prints on five different papers.
People have asked me how I got the dramatic shadows in the pumpkin notans. The key was to use a very small, almost point source light at a distance and eliminate ambient room light. I used an LED headlamp about 6 feet away from the pumpkins. The LED headlamp is a great light source for chiaroscuro because it has only a single LED and it is pretty bright, even at a distance. By turning off the room lights, I was able to eliminate most ambient light and this intensified the blacks of the shadows.
I found the most successful arrangements where those where the subject was mostly backlit, with a bit of intense light peeking around the edge. Once the light is positioned, it helps to choose a background that contrasts with the lighting on the subject. I often used a split background with white to accentuate the edges in shadow and black to bring out the illuminated edges.
When working with dramatic lighting, the room tends to get pretty dark so you either need to work from photos or use one of those clip-on booklights on your drawing board.

An LED headlamp in a darkened room makes dramatic shadows.
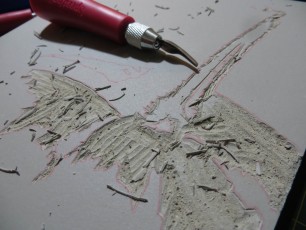
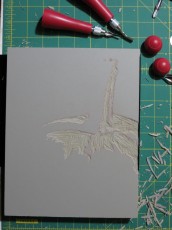
The pumpkin notans were so successful I decided to reproduce them as linoleum block prints. I haven’t done this sort of a project since elementary school, but the block cutting went well. I pulled two test prints by hand using a baren and was pretty happy with the block, but still need to sort out the ink and paper combination so that I get solid blacks. My first print showed good detail, but the ink transfer was poor. I used a lot more ink on the second print and this helped the blacks, but I lost a bit of detail. Both prints were made with Dick Blick water soluble printing ink on Strathmore 300 Bristol Vellum. I’ve heard that oil based inks work better on cotton fiber papers, and that water soluble inks are better on Japanese rice papers. I also suspect that a thinner paper would take the ink better than the Bristol.
Mandy Hallenius has put together some fantastic lesson plans for teaching classical drawing in a K-12 art classes. She currently has four lessons available for download. Check them out.
Over the weekend I did this small three-value study of Lake Keechelus.

I was a bit disappointed in my first attempts at Halloween notan studies because I used India ink and it tended to show my messy brushwork. A single layer of India ink has a matte surface, but as brush strokes overlap, the shellac in the ink becomes glossy as you can see in the photo below.
")
Speedball India ink on Strathmore Bristol
One of my third year classmates, Scott McCall, suggested I try gouache instead and it made all the difference in the world. Gouache dries quickly like india ink, but it is also opaque and its matte finish does not show brushwork. You can work and rework the goauche and no one will ever know.

Holbein Artist’s Gouache on Strathmore Bristol
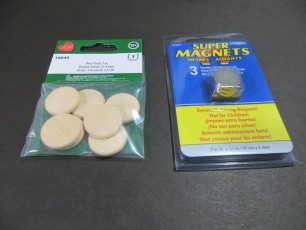
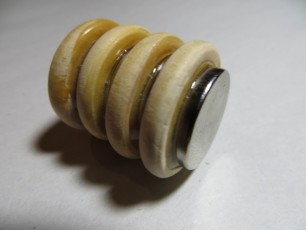
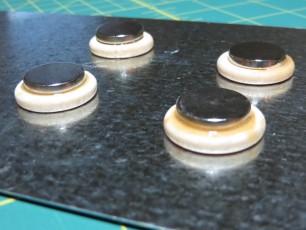
If you have a magnetic drawing board, you may have run into trouble removing the super-strong rare-earth neodymium disc magnets. The problem is that they are small and hard to grip. I solved this problem by gluing wooden discs to the magnets. The wooden discs are slightly larger than the magnets, making them easy to pick up and fun to place. Here are some tips for making these ergonomic wonders:
There is something about classical art that seems to attract the artist-inventor. Every day in the Atelier, I work side by side with modern day Renaissance men and women whose inventions never cease to amaze me. One of my favorites is Ulan Moore’s magnetic drawing board which incorporates a thin sheet of steel so that drawings can be easily positioned and held in place with magnets. Say good bye to masking tape, push pins, and bulldog clips. Ulan’s solution is elegant and it’s fun to use.
In the Atelier, we’re always in the middle of a bunch of projects, so it is nice to have lots of drawing boards. I wanted four, but I didn’t want to spend a lot of money and I wanted instant gratification, so I set out to improve Ulan’s design with four goals in mind:
After a trip to Home Depot and Michael’s, I came up with a design that can be assembled in 15 minutes for under $15. The key to the reduced cost, weight, and assembly time is the use of four galvanized steel shingles instead of one large sheet of steel. The shingles are widely available and inexpensive – a 5″ x 8″ shingle costs $0.62 while an 8″ x 12″ shingle will set you back about a buck. I was able to simplify assembly and reduce costs further by sandwiching the shingles between standard-sized 20″ x 30″ foam core and presentation board.
Supply List
| 4 | Galvanized steel roofing shingles. | Home depot | $2.48 |
| 1 | Elmer’s half inch thick foam core, 20” x 30” | Michael’s | $4.99 |
| 1 | Strathmore 400 presentation board, 20” x 30” | Michael’s | $4.99 |
| Glue or double-sided tape | |||
| Electrical tape | |||
| Newsprint |
Directions
The drawing board is made up of four layers, with the foam core at the foundation for stiffness. The steel shingles are glued to the top of the foam core. The shingles don’t cover the entire 20″ x 30″ surface of the foam core. In order to ensure the drawing board is perfectly smooth, the spaces between the shingles are filled with newsprint shims. I found I needed about 5 layers of newsprint to match the thickness of the shingles. The next layer is a piece of Strathmore Presentation board. The presentation board holds the shingles in place and smooths out any gaps between the shingles and the newsprint shims. The board is topped off with 7 sheets of newsprint padding.

1. Use double-sided tape, glue, or glue dots to attach the four shingles to the foam core. Each shingle should be in a corner with its edges flush with the edges of the foam core.
2. Place layers of newsprint shims into the cross-shaped area not covered by the shingles. Depending on the thickness of the shingles, you will need 5 to 7 layers of newsprint. Be sure to tape the newsprint in place so that it cannot slide out of the drawing board.

3. Use double-sided tape, glue, or glue dots to attach the presentation board to the top of the stack.
4. Tape about 7 sheets of newsprint padding on top of the presentation board. I have found that taping down all four edges of the newsprint can lead to an uneven surface over time as the newsprint wicks moisture from the air and expands. If you only tape down the top edge, the newsprint can expand and still hang flat without and buckling.
Your light-weight and low-cost magnetic drawing board is now ready to use. For the best results use the super-strong rare-earth neodymium disc magnets.