Moving On

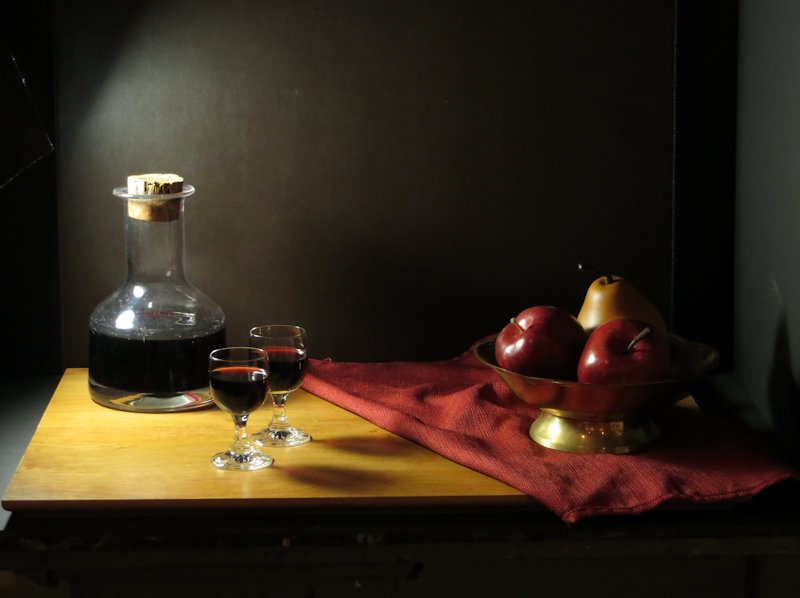
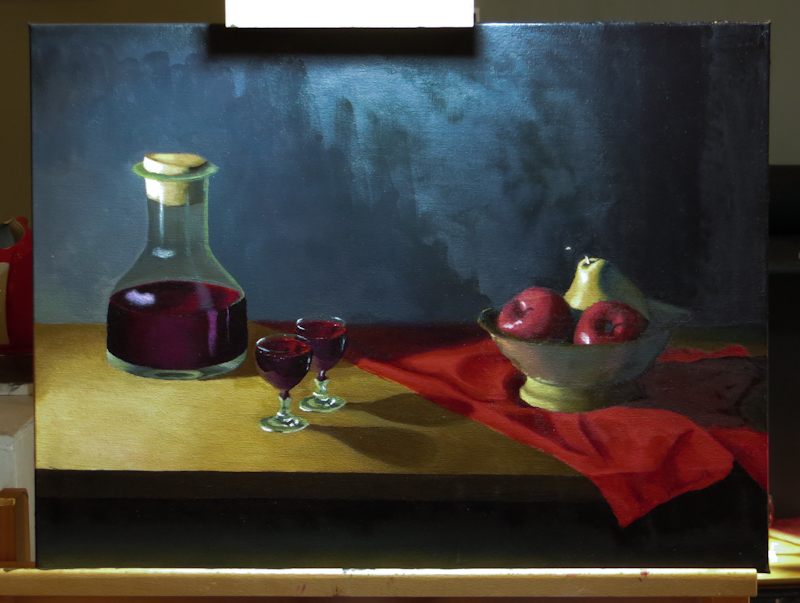
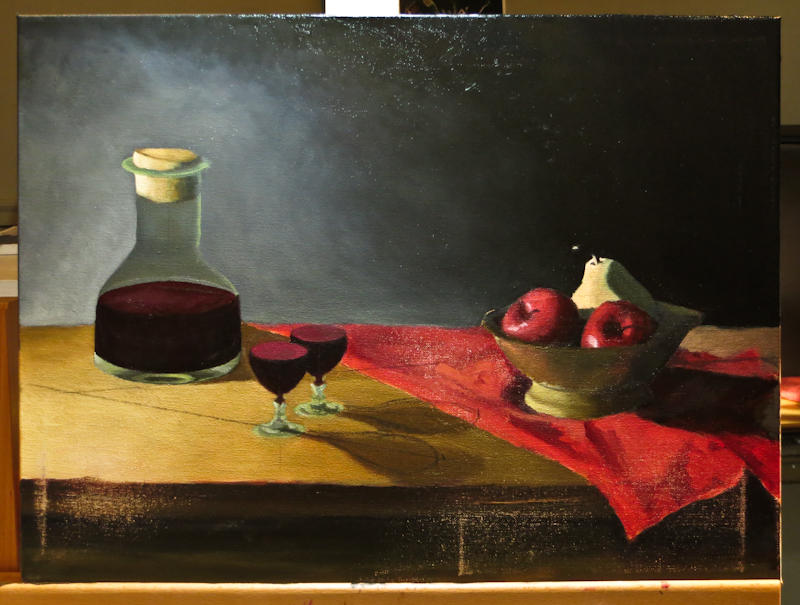
You’re probably wondering what happened to my Wine and Apples painting. I didn’t finish it to my satisfaction, but Gary and I agreed that I had reached the point of diminishing returns on learning to paint.

With that we declared the painting finished! What a relief! I took the painting off the easel, struck the set and moved on to Limes and Lemons.

Here are a few take-aways from my first atelier painting:

  1. The study and the underpainting seem to have more energy and personality than the finished painting.
  2. The parts that went quickly, like the initial drawing, the underpainting, the apples, and the cloth, were more satisfying and more compelling.
  3. Many of the passages where I struggled didn’t really contribute much to the success of the overall painting. Gary says these areas will improve as I get more experience.
  4. From a learning perspective, it is better to create more paintings than to endlessly rework a single painting.

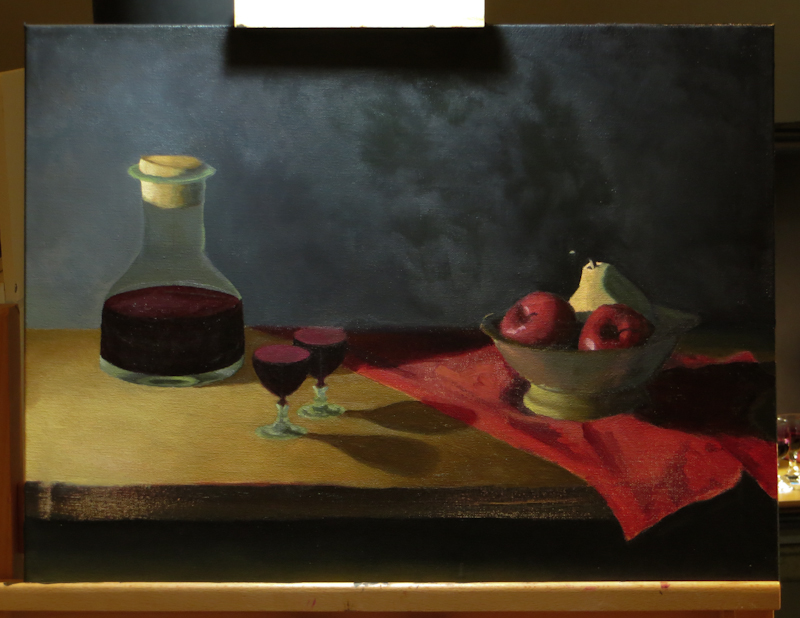
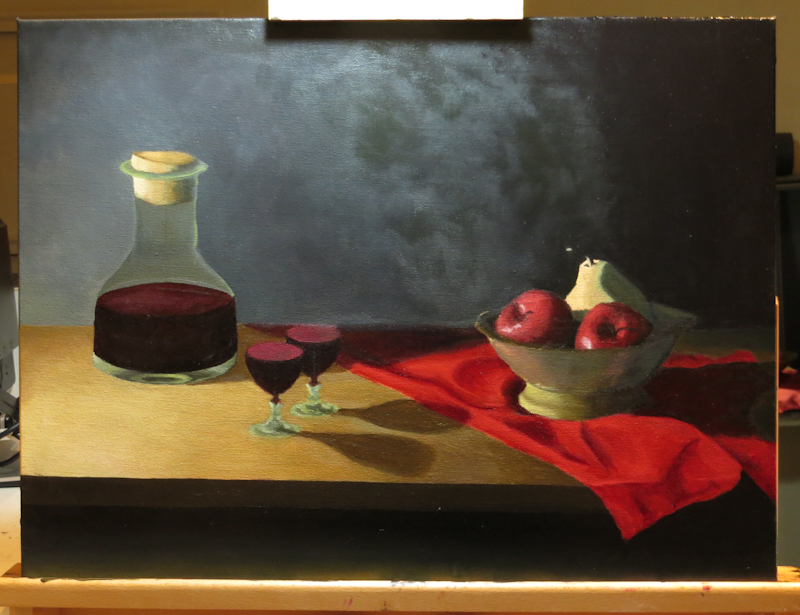
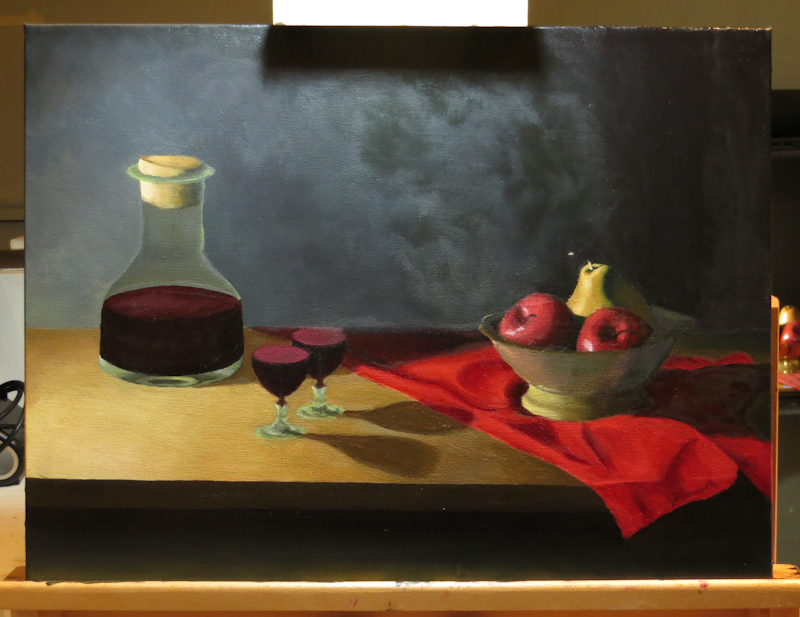
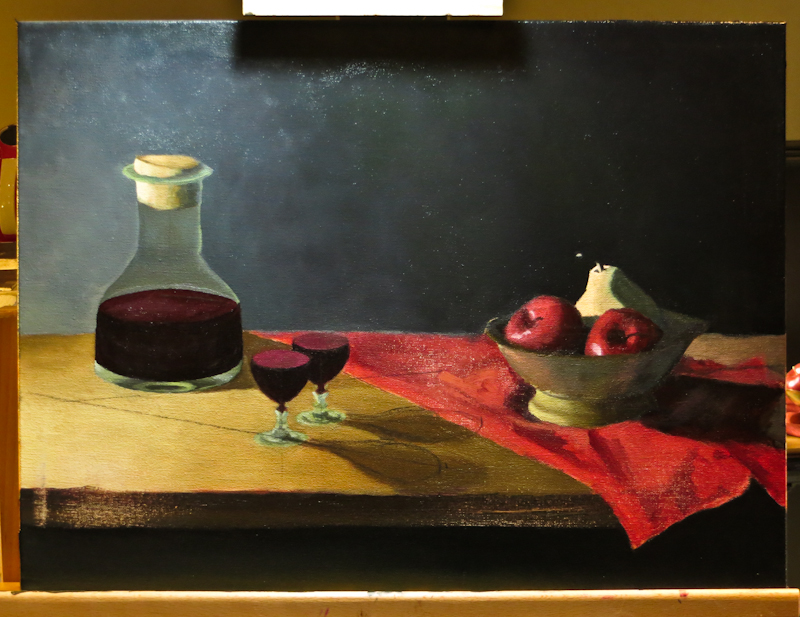
Here’s a recap of the stages of Wine and Apples:

The actors are on the stage.

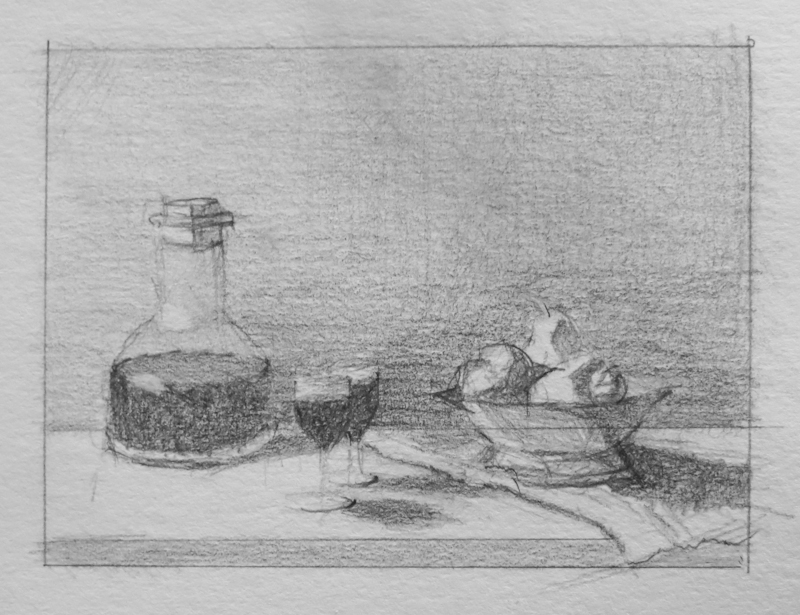
Twenty minute value study in graphite, 3″ x 4″.

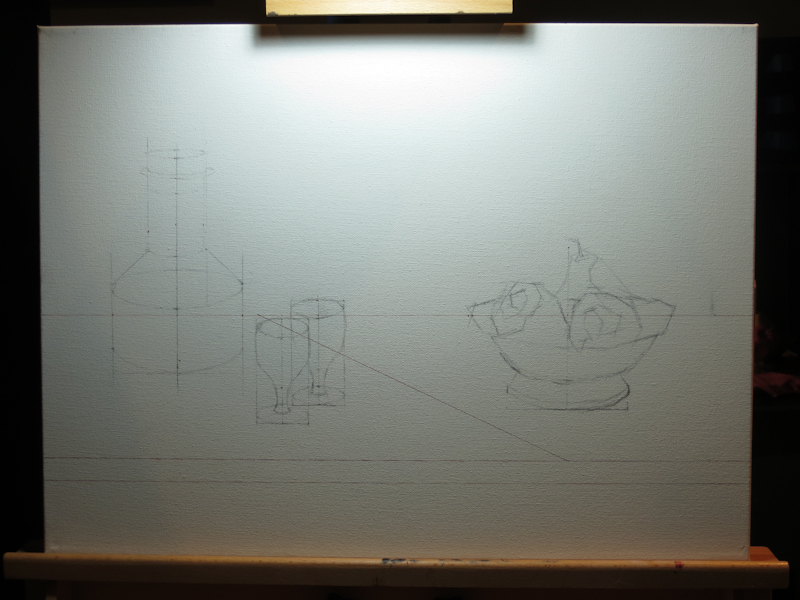
18″x24″ canvas with Indian Red Faber-Castell Pitt pen and vine charcoal.

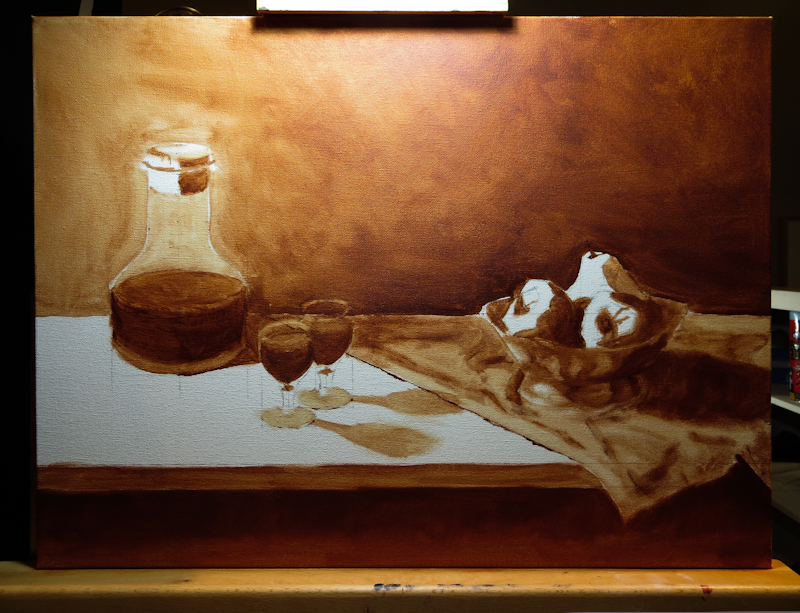
18″x24″ under painting, burnt sienna on canvas.

The finished painting.

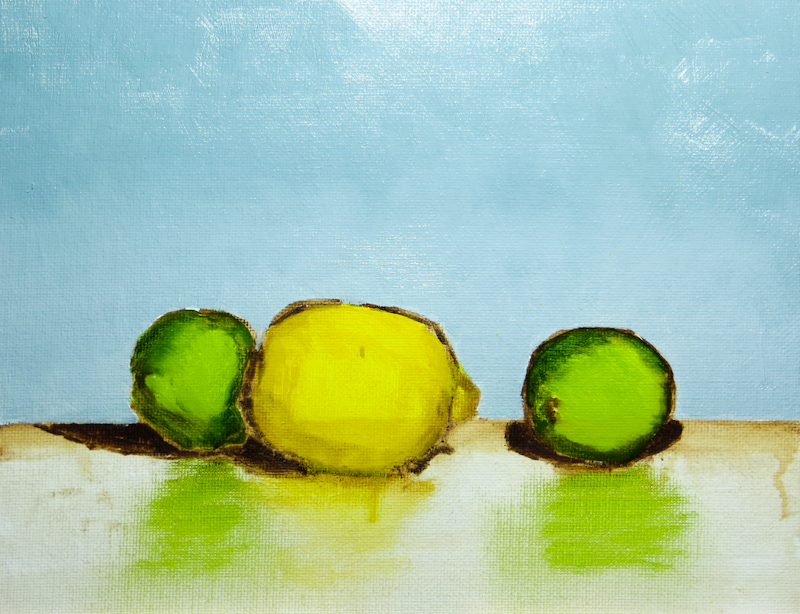
Limes and Lemons

Today I started on a new painting! Gary wants me to shoot for four paintings over the next month, so I am focusing on smaller sizes and simpler, less diverse subject matter. The idea is that I will learn more in a month from four simple paintings than an entire quarter spent on a one large and complex painting. This first study is on an 8″x10″ canvas panel.

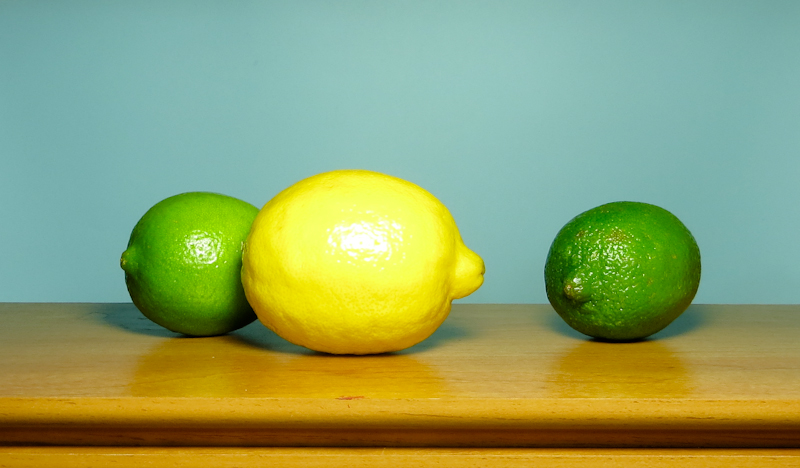
Here’s the tableau. After months of intense chiaroscuro, I wanted to do something high key with a lot of bright happy colors. Gary suggested citrus fruits since they don’t spoil too quickly and are fun to paint.

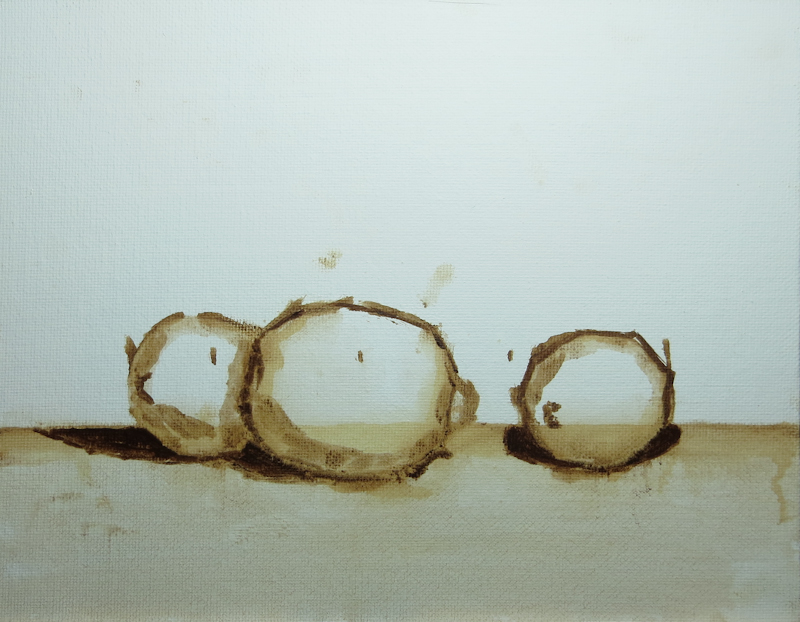
I did my initial drawing with a brush, using Burnt Umber diluted with Gamsol. My goal in using the brush, instead of charcoal, was to learn to draw directly in paint.

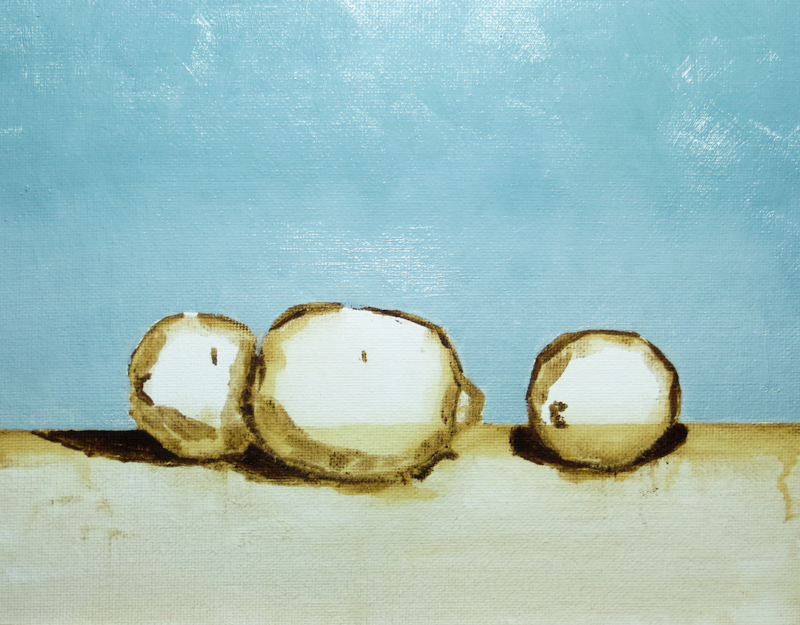
The background is a mixture of French Ultramarine, Cadmium Orange, Cadmium Yellow, and Titanium White. I think I did a pretty good job matching the color.

Here’s the painting at the end of the first session. It reminds me of a Cezanne because of the dark outlines around the fruit. Although I like Cezanne, my intention is to cover the dark outlines when I paint over the placeholder colors on the fruit.

Before leaving for the day, I took 5 minutes to quickly brush in some diluted placeholder colors in order to get an idea of how the image was coming together. I used Cadmium Yellow Medium for the lemon and a mixture of Sap Green, French Ultramarine, and Cadmium Yellow Medium for the limes.

Back to Work

It’s been a while since my last post. With holiday travel, cooking and cards, there just wasn’t time to paint. Now I’m back and determined to finish this painting so I can start on something new!

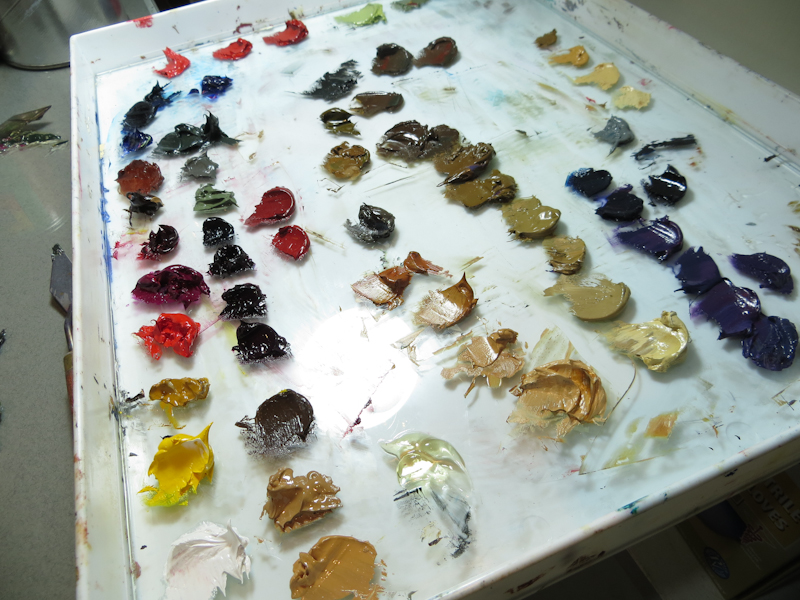
At this point, I am adding finishing touches all over the painting, so I need a little bit of each color.

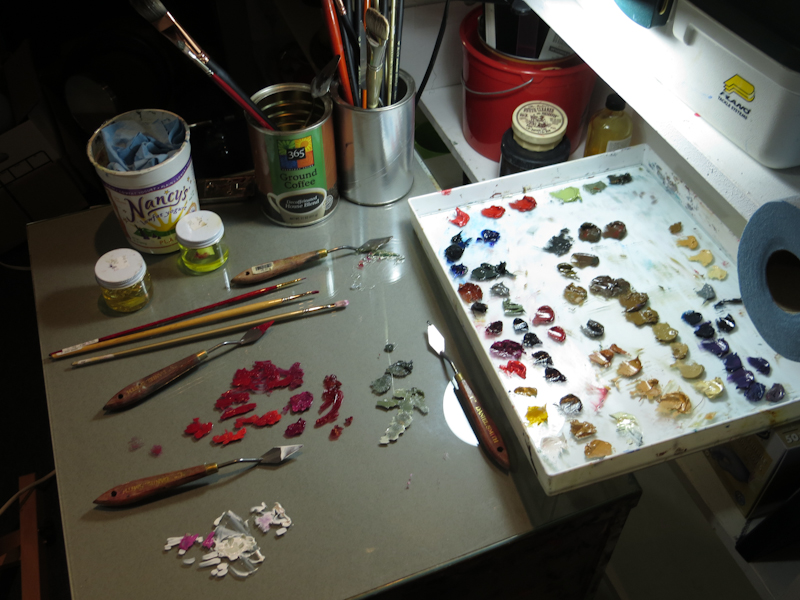
Over break I got a big piece of glass to work on. The large work area is a real joy, especially at this stage in the painting where I need to hop from place to place, using miniscule amounts of all of the colors.

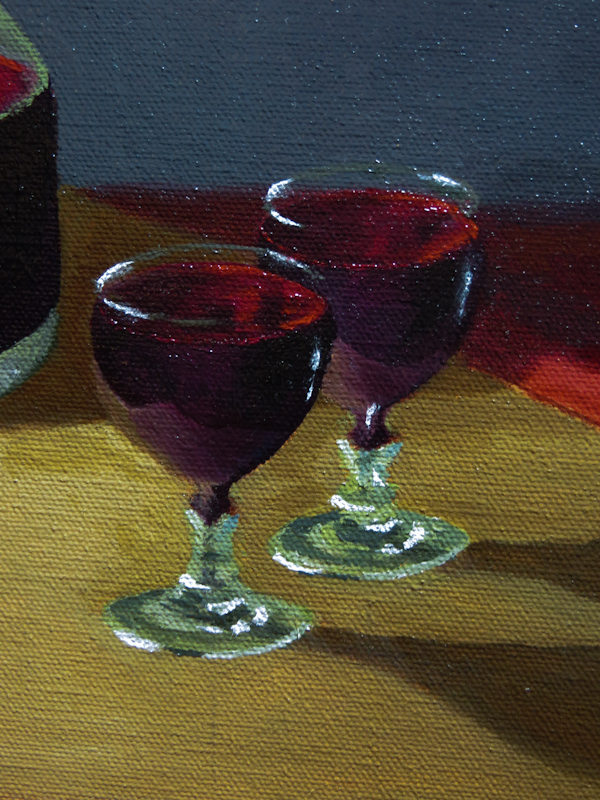
I think the reflections in the wine glasses turned out pretty well. I will probably knock the specular highlights down to a light gray and do a bit more work to adjust the shape of the base of the glass on the right.

Here’s the painting at the end of the evening. I’m not happy with the reflections on the carafe, so I will probably rework it tomorrow. Note that the lower left half of the painting below the diagonal seems wet, while the upper right half is dry. Before I applied any paint, I “oiled out” the areas where I planned to work by applying a thin coat of medium, in this case Neo Megilp. Oiling out gives a uniform working surface and assists in blending.

Holiday Cards

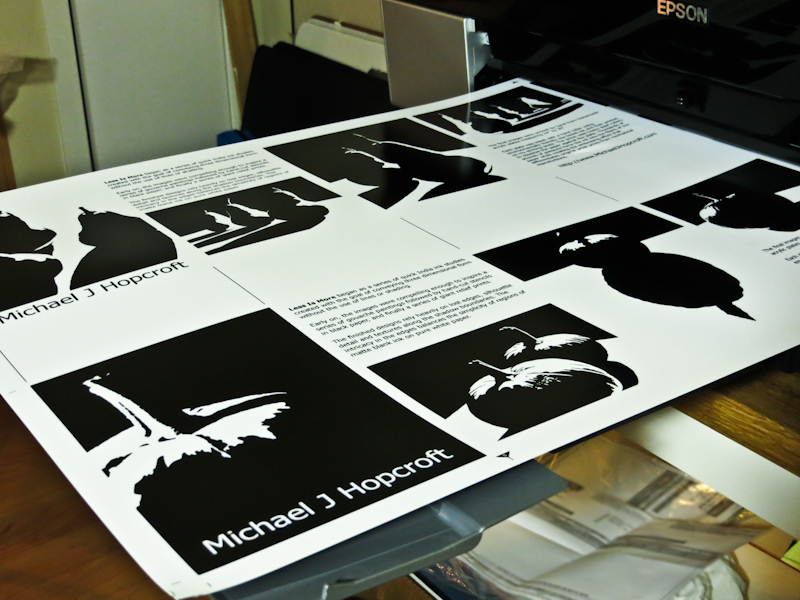
This evening I worked on holiday cards for friends, family, and galleries. I wanted to create something distinctive that would show off a complete series of prints. I experimented with a number of ideas including stacks of trading cards (with bubble gum) and a large square collage in a custom square envelope, but in the end I borrowed an idea from New Yorker cartoonist Mark Ulriksen.

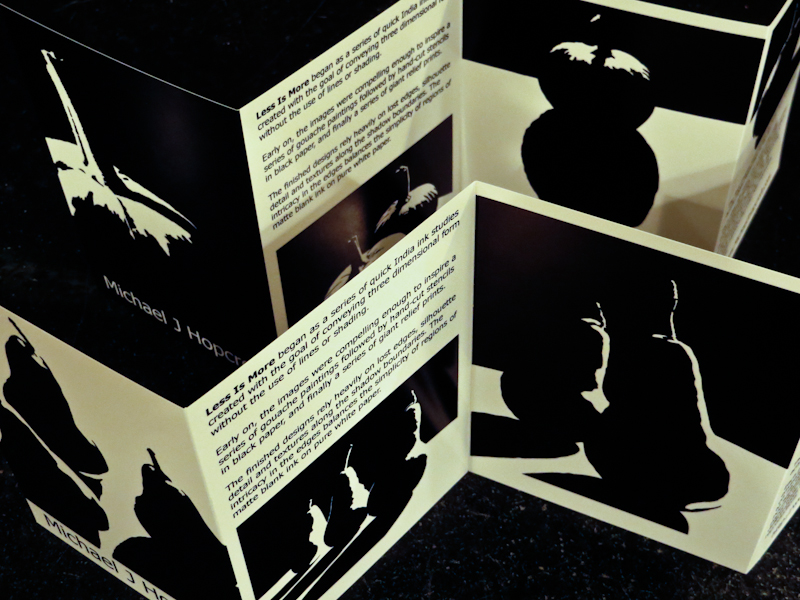
Over the summer I heard him speak about climbing the ladder as a young illustrator and he mentioned that he used an accordion fold design for an early portfolio mailing and found that it worked well because people would leave it standing up on their desks.

The idea sounds simple enough, but it took a long time to prepare reproductions of each of the prints and then lay everything out in Adobe Illustrator. I also made a bunch of test prints on various papers from a Red River Paper sampler pack before ordering the large sheets and envelopes for the actual cards.

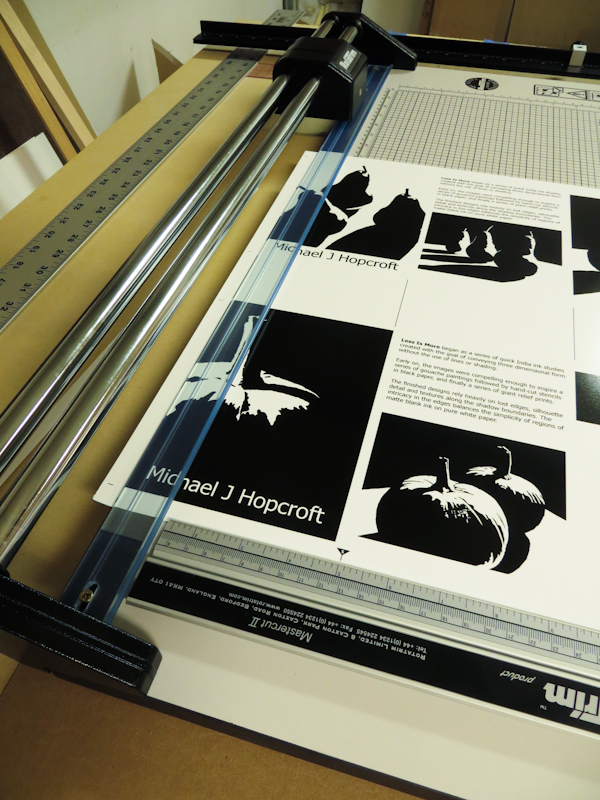
A single 17″ x 25″ sheet has room for two accordion fold cards. Here I’m using 68lb Ultrapro Satin Version 3.0 from Red River Paper.

The 17″ x 25″ sheets barely fit in my trimmer. It took quite a while to work out the locations of the various alignment marks. Since I can’t see exactly where the blade will land, I use alignment marks like the triangle on the bottom of the page. In this example, I need to align the triangle with the 5″ mark on the ruler in order to get a perfect cut.

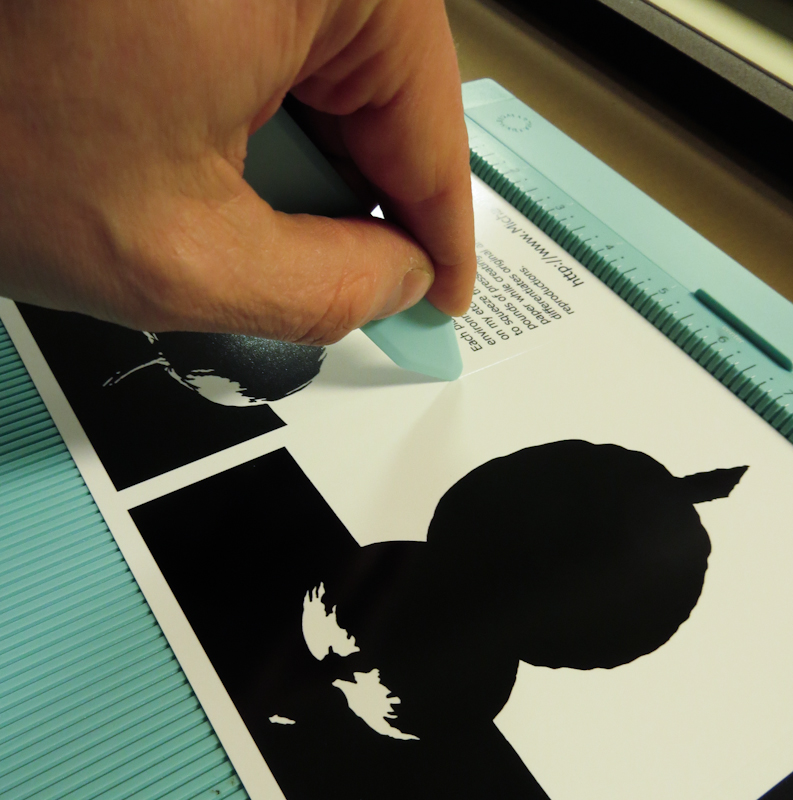
Using a $10 Martha Stewart bone folder from Michael’s to score the folds. It turns out that not all papers are suitable for folding. Red River has a very nice 86lb double sided glossy paper, but I couldn’t use it because it had a tendency to disintegrate when I scored it.

The accordion fold cards are visually appealing and stand on their own.

Fixing Shadows

The evening I worked on the table top and the shadows. Here’s how the painting looked when I started:

Here it is at the end of the evening:

Specific changes:

  • Darkened back left of tabletop to help emphasize the pool of light in the front.
  • Darkened back right corner of tabletop.
  • Softened rear table edge center and right.
  • Moved the shadows of the wine glasses to be consistent with a single light source.
  • Adjusted the shapes of the wine glass shadows.
  • Painted decanter shadow.
  • Extended shadows from tabletop onto red cloth.
  • Adjusted bowl shadow.
  • Painted over some sanding marks.

Reimagining the Background

This evening I reworked the background (again). Pictures below show before and after.

This time I used bigger brushes to get a smoother gradient and I played around with putting more color into the background. The new background has neutral grays along with slightly violet and slightly green grays. I am hoping these will work well with the red in the cloth and the color of the wine.

Scumbling

Imagine a sunset at the end of a crystal clear day. The sky directly overhead is a deep blue that gradually fades to yellow along the horizon. If the air is clear enough, there will be no reds or oranges – just blues and yellows.
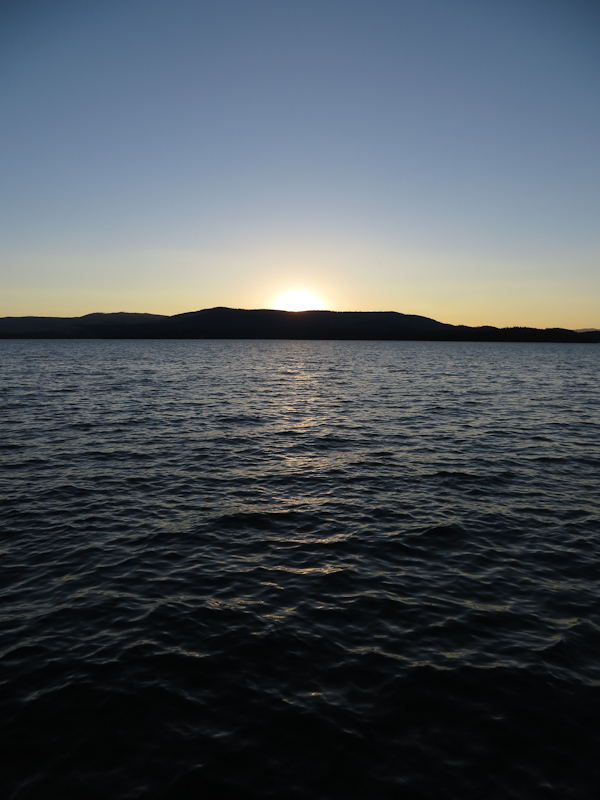
How would you go about painting such a lovely view? This is a question I have pondered since I began painting. Some of my recent color gradient printing experiments led to an interesting insight.

The challenge in painting a blue-to-yellow gradient is, as every school child knows, that yellow and blue paints combine to make green. If you start with blue at the top of the canvas and work your way down while increasing the yellow and decreasing the blue, you will get a lot of green in the sky. During a yellow-blue sunset, you may see some green in the sky, but not nearly as much as you will get by mixing yellow and blue paint on the canvas.

The reason the green appears is that paint mixing works on the principle of the subtractive color model. In the subtractive color model, each pigment or dye in the mixture absorbs and subtracts out part of the spectrum. Combine more colors, and more of the spectrum is removed, leading to darker colors. Combine enough colors and you will get a dark gray.
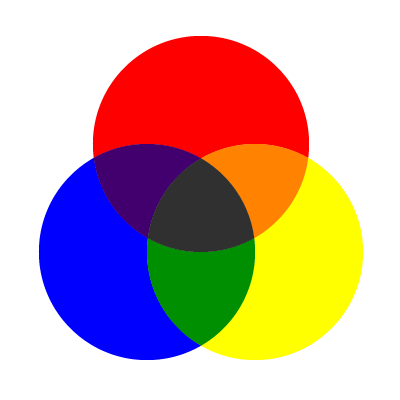
For a long time, I thought the only way to get a yellow-blue gradient with no greens was to gradually add orange to the blue until it desaturated to gray and then remove violet (or add yellow) until the gray transitioned to yellow. This will make a smooth gradient with no green, but it’s not guaranteed to capture the luminous essence of a sunset.
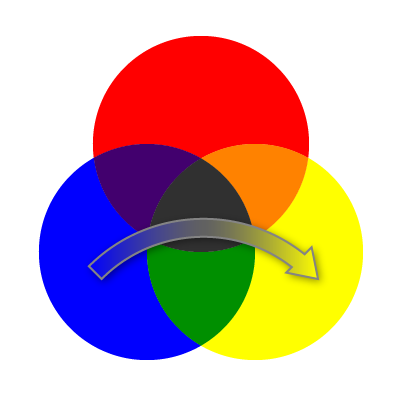
My insight came when I tried printing a blue-to-white gradient on top of a white-to-yellow gradient. I was using an opaque blue ink on top of dry yellow ink, so there was no opportunity for subtractive mixing. Here’s what I got:
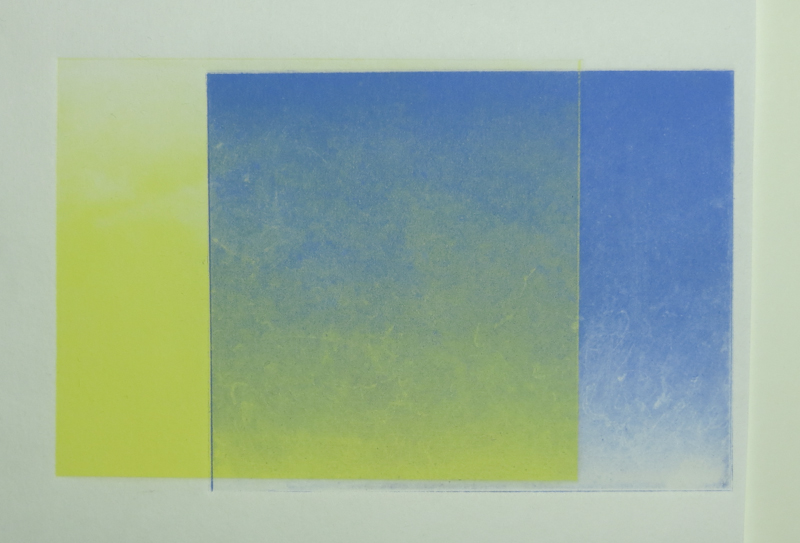
As you can see, there is no green! The colors blend directly from blue to yellow. What’s going on? The colors in the print are optically blending. White light that falls on the pigment is reflected back as either blue or yellow. When these two colors fall onto adjacent cone cells in the retina, they create a sensation that simultaneously conveys blue and yellow. The perceived color is a bright neutral, that is warmer or cooler depending on the relative strengths of the yellow and blue pigments.

The colors in a sunset work the same way. Blue light from the sky blends on the retina with yellow light from the sun to form a bright neutral. Both the print and the sunset are examples of the additive color model.
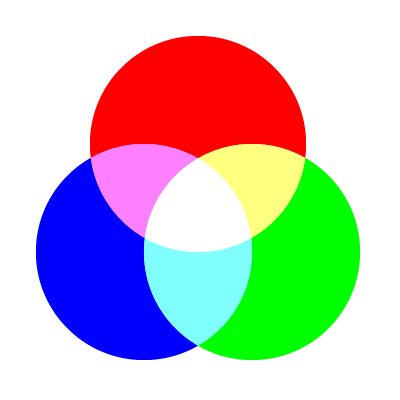
In the additive color model, blue and yellow are complementaries that combine to form a neutral that is brighter than either color on its own. Optical blending, which is based on the principle of additive color, allows us to go directly from blue to yellow without creating green.
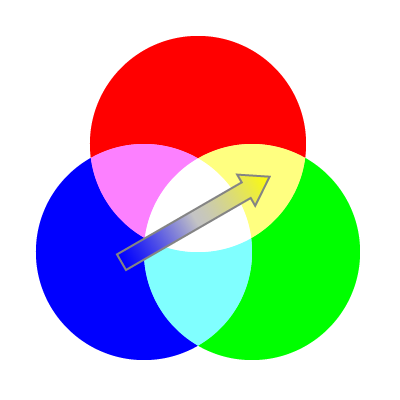
Here’s an example of optical blending in a blue-to-yellow gradient.

We see optical blending every day on computer screens and printed items where the images are made up of millions of small pixels or dots. It turns out that we can get this effect in paint as well, using a technique called scumbling.

The basic idea behind scumbling is the same as my printing experiment. A broken pattern of opaque paint is applied on top of a layer of dry paint. The dot pattern in the top layer is created with a dry, lightly loaded brush, that just barely scrapes across the surface, leaving an irregular pattern with lots of gaps where the underlying paint shows through. If you were to scumble opaque yellow paint over dry blue paint, it would look something like the image below.
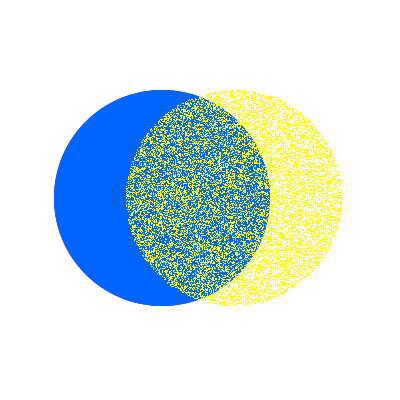
We’ve seen that subtractive color model governs the blending of wet paint, while the additive color model governs optical mixing techniques like scumbling. When painting a scene that uses optical mixing in the real world, it helps to consider optical mixing as a painting technique.

Further reading: