Wine and Apples Color Study

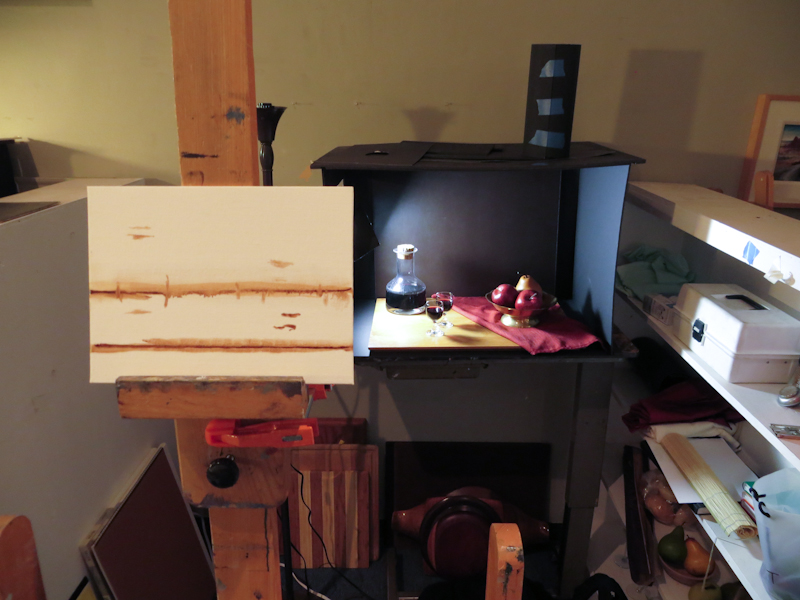
After organizing my space and cleaning palette boxes and brush tanks, I finally got a chance to work on a color study for my wine-and-apples scene. Gary suggested working small and spending no more than two hours. This was to ensure that the painting remained in the realm of a study.

I decided to do a 6″ x 8″ study for a painting that will likely be 18″ x 24″. My approach was to draw the image with a paintbrush using burnt umber thinned with OMS, and then block in the value masses.

I spent about an hour working with burnt umber and had just started mixing up colors for the apples when I realized that the incandescent lamp on my easel didn’t match the 5500k daylight bulb on the scene. When I matched the paint perfectly at the easel and then brought a sample into the scene, it looked like a garish bluish purple. I decided to call it a day so that I could get another 5500k lamp for the easel.

As I was heading out, one of my classmates asked my why I did an under painting for a color study, instead of just laying color directly on a bare canvas. I suppose the answer was that I did it out of habit. When I started, my intention was to just draw the outlines in burnt umber, but then I got into it and kept adding more shadows and details until I had an under painting. I guess this is why Gary suggested keeping the entire exercise under an hour.

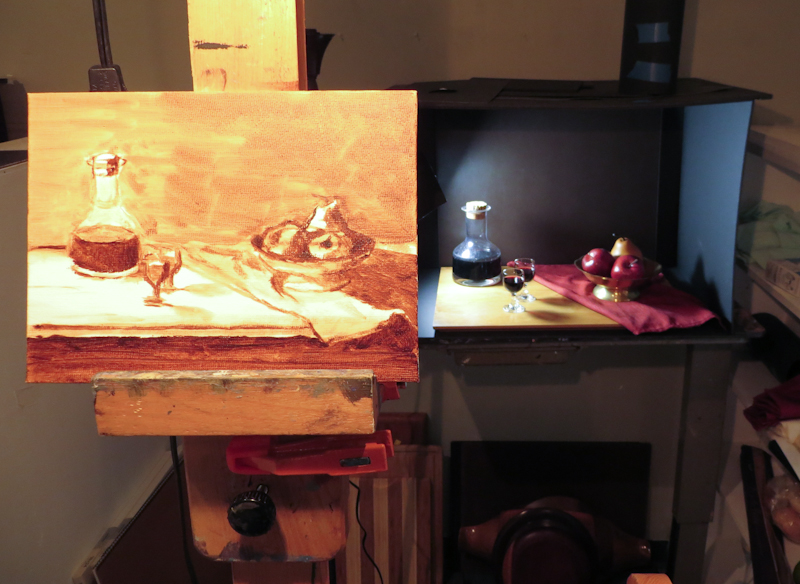
Blocking in the top and bottom of the tabletop, the decanter, and the bowl. Note that I have adjusted my viewing angle so that the vertical positions on the canvas align with the corresponding positions in the scene.

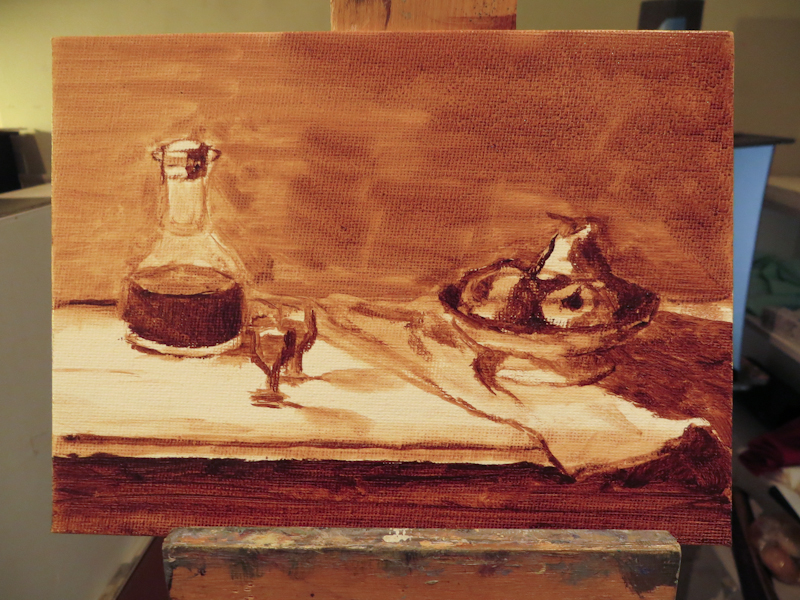
Here’s the view at the end of the session.

I spent about an hour blocking in the scene in burnt umber.

Preparations

I went in to the atelier this morning to paint a color study for my first still life assignment, but ended up spending a bunch of time preparing for my first brush stroke. When I joined the Classical Atelier last year, I put painting on the back burner while I focused on charcoal drawing and then printmaking. Now as I turn my focus back to oil painting, I am facing a seemingly endless amount of preparation, from cleaning palette boxes to finding matching light bulbs to excavating my shadow box from the closet to sorting paint. I know it will all be worth it and I will really enjoy my space and my tools, but still I want to be painting . . .

I really should have cleaned my palette when I finished my last painting, but I didn’t know back then that I was done . . .

Popping Tags

Went thrift shopping for props. Got a lot of interesting items which I can’t wait to paint. Here’s the first tableau. The wine is real, but the apples are fake. My classmates warned me that wine “evaporates” very quickly in the atelier and that I would need to top it off daily.

The actors are on the stage.

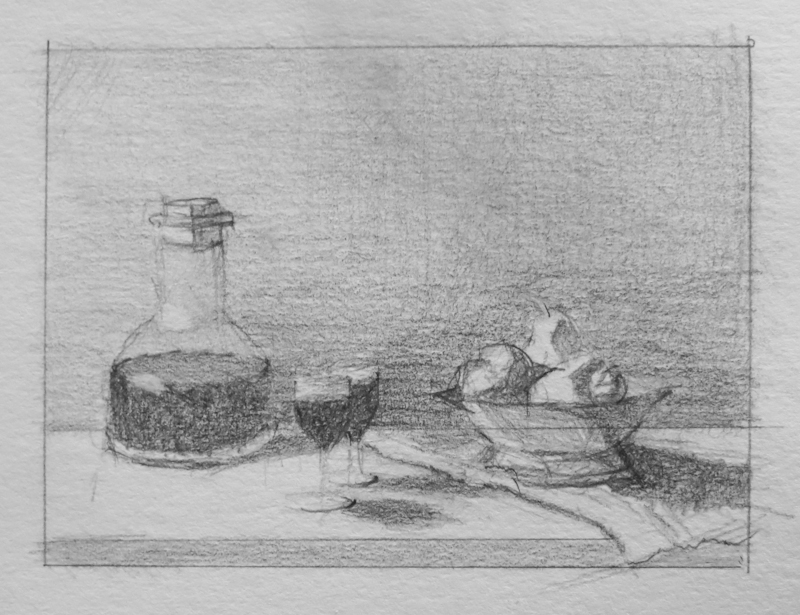
I spent about an hour trying out various arrangements and viewpoints before settling on this one. Then it was time to do a small value study before breaking out the paint brushes.

Twenty minute value study in graphite, 3″ x 4″.

Back to School

As summer draws to a close, we see less of the sun in Seattle and the nights grow cooler. It is time sharpen those pencils and head back to school!

This year I will be studying under Gary Faigin along with six other students in the Still Life Atelier at Gage Academy. I really enjoyed my time last year in Juliette Aristides’ Classical Atelier, but found that it was hard to keep up with the full time students while balancing work, family, and art.

Gary’s program is designed for part time students. Since the models are wine bottles and bananas, we can work any time of the day or night, and we never have to pay overtime. This is great for me, because I can put in a full week at Microsoft and still do art on evenings and weekends.

Our first class was a discussion and critique of summer projects. Now I am gradually moving in while acquiring props at the thrift shop and art supplies at Dick Blick. I already have most of what I need, with the exception of canvases.

One thing I learned in the first class is that still life is traditionally taught with life size paintings. When I asked Gary what size canvas or board to get, he said not to work with anything smaller than 18″ x 24″. It reminded me of my first year of figure drawing where we never worked smaller than 18″ x 24″ and sometimes worked even larger to get practice drawing with our arms instead of our wrists. I don’t think I have ever done a painting larger than 9″ x 12″, so this will be fun!

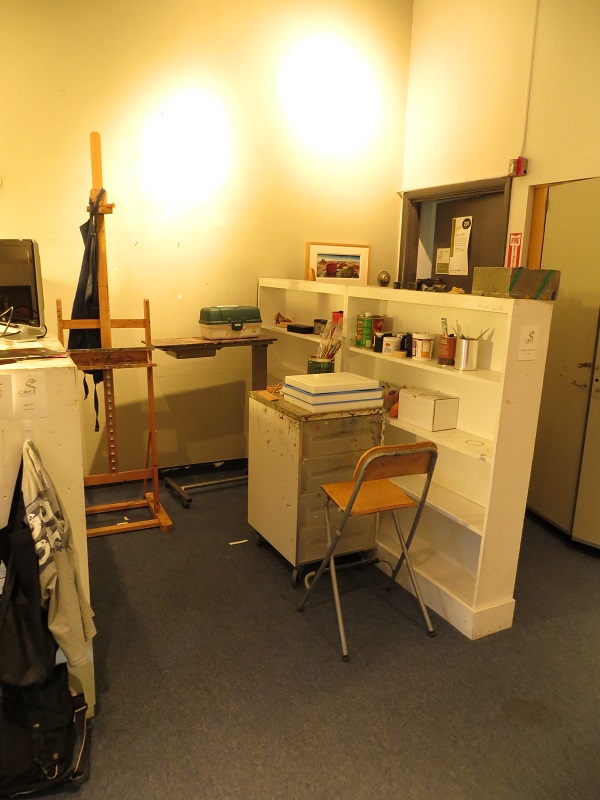
Move-in day, first day of classes, Gary Faigin’s Still Life Atelier. This is my studio space – probably the cleanest you will see it all year.

Epson 3880 Roller Problems

“Theory and practice are the same, in theory, but different in practice.”

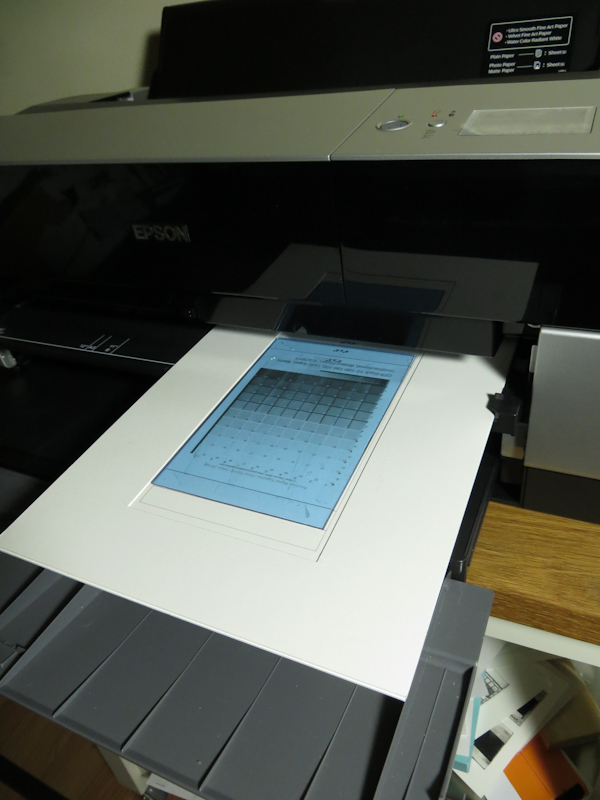
My first attempt at eliminating track marks on my ImagOn emulsion was to make a window mat carrier, the theory being that the rollers on the border of the window would lift the center rollers above the surface of the ImagOn.

My plan was to make a window mat carrier that would lift the top rollers above the surface of the ImagOn in order to avoid track marks.

I tried a bunch of different window mat carriers and found they either had no impact on the track marks or they got hung up on the top edge of the window mat. A quick look inside the printer and a perusal of the service manual showed me the problem (see page 53 and section 5.3.17).

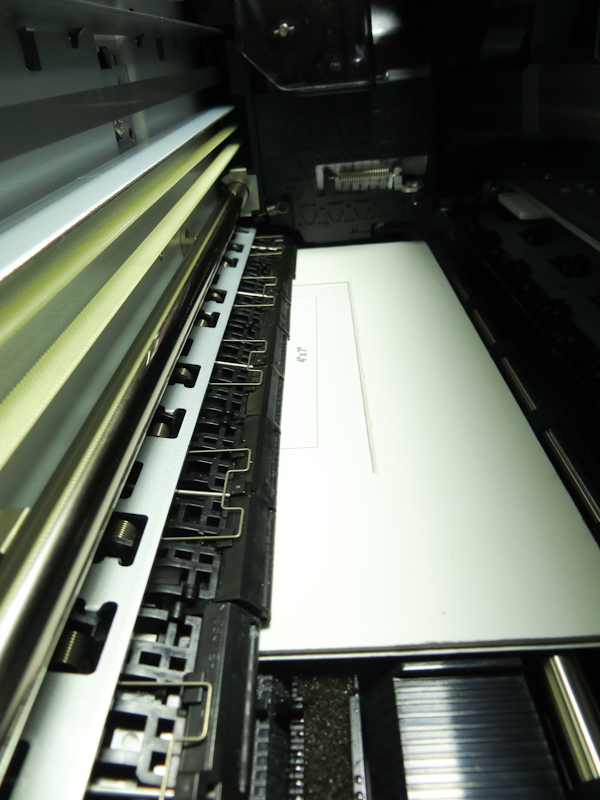
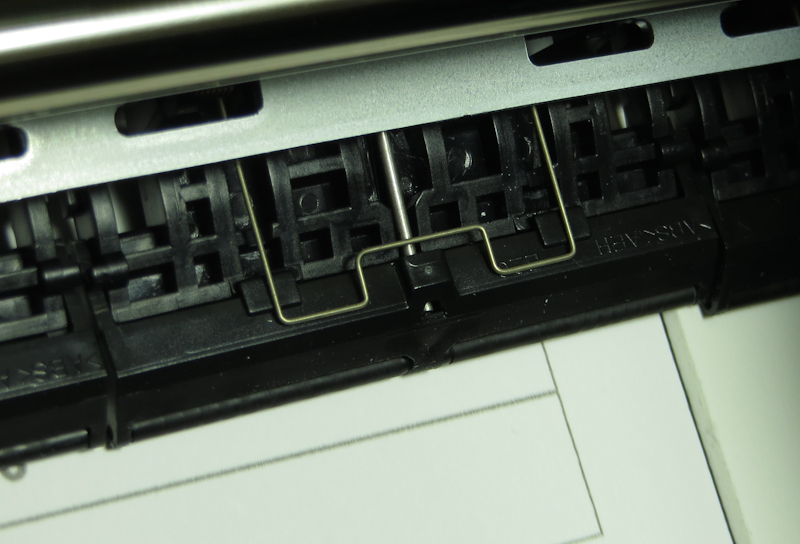
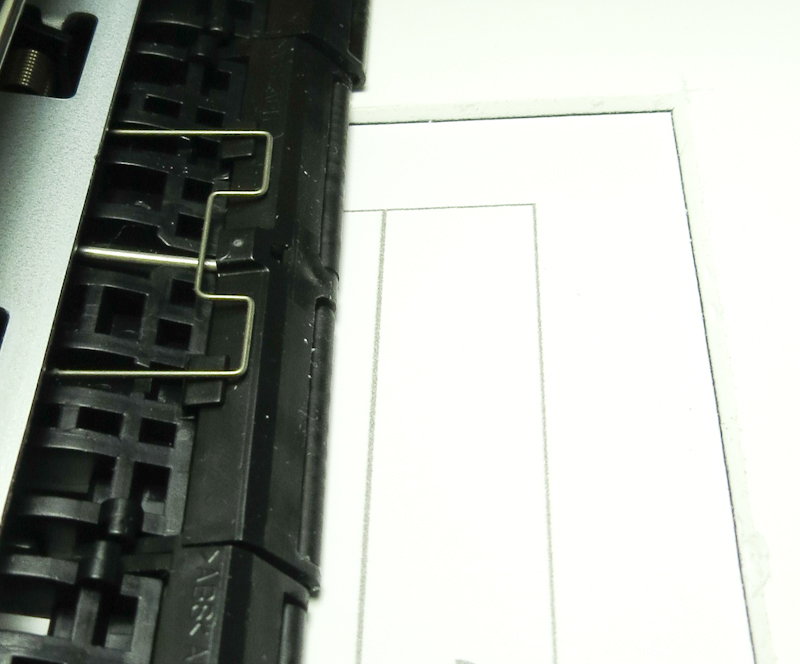
The top side of the Epson 3800 paper feeder has 8 roller assemblies, each 2″ wide and holding two small rubber rollers. The rollers are organized into an assembly called the grid roller. The paper passes from back to front under the grid roller on the way to the print head. The grid roller presses the paper against a steel paper feed roller that actually pulls the paper forward.

Each roller assembly is free to move up and down independent of its neighbors. A metal spring clip holds the roller assembly firmly against the paper.

Because the roller assemblies can move independently, the ones inside the window will roll across the surface of the plate. This roller is partially inside the window mat with the top edge riding on the edge of the mat.

In practice, the rollers fall into the window in the mat and run across the surface of the emulsion, leaving track marks.

Once I had a good understanding, I tried a couple of ideas without success:

  • Ran a printer cleaning sheet in case dust or goop on the rollers was responsible for the marks.
  • Attempted to reduce the pressure on the rollers by increasing the paper thickness setting. My hope was that this setting would prevent the Paper Guide Upper Assembly (see page 53 in the service manual) from pressing down quite as hard.
  • Attempted to reduce the pressure on the rollers by setting the paper type to glossy. My hope was that the printer might use less pressure when printing on glossy.
  • Tried printing on a very thin plate consisting of ImagOn laminated to a piece of Pictorico OHP transparency film. This plate was thin enough to run through the sheet feeder. My hope was that the Paper Upper Guide Assembly might not be able to exert as much pressure on really thin media.

I’ve considered, but not tried the following ideas

  • Somehow pull the middle 6 roller assemblies up against their spring clips so that they can’t touch the emulsion. This would leave the 2 roller assemblies on the end to move the plate. I don’t plan to try this because it might void my warranty and because the rollers are probably necessary to keep the media flat as it goes under the print head.
  • Make the ImagOn surface more resistant to scuffing by removing the protective plastic and letting the plate dry, exposed to air before printing.
  • Make the ImagOn surface more resistant to scratching by heating the plate. Not sure if heating the plate will harden or soften the emulsion.
  • Make the ImagOn surface more resistant to scratching by cooling or even freezing the plate. This approach may have problems with condensation.
  • Make the ImagOn surface more resistant to scratching by pre-treating it with vinegar. I don’t know whether the plate is still light sensitive after being treated with vinegar.

As you can see, I’m pretty close to being out of ideas. It is possible that ImagOn DTP only works with high end printers like the 4900, 7890, 7900, 9890, 9800, and 9900 that use vacuum suction to hold the paper in place without touching the top surface.

It is also possible that my 3880 is defective and pressing down too hard. I will know tomorrow whether my printer is defective. If it is not, I may have to give up on DTP and make a strategic retreat to single exposure ImagOn. This means I will need a vacuum frame, but I won’t need a calibrated light source.


Epson Printer Woes

The problem with the Epson 3880 tractor marks was on my mind all night. I was wondering whether the problem was limited to the manual front feeder, so this morning I ran pieces of Epson brand card stock through the sheet feeder, the rear manual feeder, and the front feeder. What I found is that each piece of card stock showed track marks running from top to bottom in the same locations as I saw track marks on the ImagOn plates.

Since I had observed the problem with Epson media, and the media wasn’t even exotic I decided to call Epson customer support. The Epson customer service agent said that it sounded like a problem with the printer. He said when people call in about marks, the marks are almost perpendicular to the direction the paper travel and can be caused by a wide variety of software and configuration problems. He almost never hears about tractor marks running in the direction the paper travels and says this is almost always a sign of a hardware problem. The fact that I was seeing the marks after loading and then unloading a sheet via the front manual feeder without even printing confirmed his suspicions that my printer is defective. He said the top drive wheels should never leave a mark on the paper and certainly should not be able to mar the surface of a sturdy material like card stock.

I have my doubts, but I’m crossing my fingers that he’s right. They are shipping me a replacement unit which should arrive on Tuesday.

Overall, my experience with Epson customer service was good, but I was a little taken aback that the replacement unit is a refurbished printer. It seems like my almost new, but defective printer should be replaced with a new unit.

Mostly depressing with a ray of hope

Tonight’s experiments were depressing, although there may have been a ray of hope at the end – I won’t know until tomorrow when I expose and develop the plate I printed this evening.

It seems the problem is that the Epson 3880 front feeder, which is the only print path on the 3880 that can handle thick stock like 0.030 polycarbonate plates, uses a tractor feed mechanism with rollers on the top side of the media. When using softer media, like photopolymer emulsion, these rollers tend to dig in and leave marks that look like bulldozer tracks. A brief search of digital photography forums on the internet found that other users have encountered this problem when using gelatin surface papers that replicate the look and feel of real darkroom paper. No one had a solution other than switching papers or switching printers. It seems that the higher end Epson printers like the 4880 and the 9800 use a vacuum system to hold the bottom of the paper in order to eliminate rollers that could make contact with the top surface of the paper. I’m still hoping I can find a work around because I really don’t want to be faced with the choice of abandoning ImagOn DTP or upgrading my printer.

I spent the evening trying out various carrier designs, hoping to find something that would lift the middle drive wheels off of the emulsion. My hope was that a window-mat design would cause the entire drive system to ride at the height of the mat. I found that carriers with thicker window mats would tend to jam as the drive wheels exited the window cutout. This suggests that the drive wheels can descend independently into the window.

In the end, I found that a three-sided window mat, which was open on the bottom would pass through the printer without jamming. I printed a plate with this carrier and found that it still shows the track marks, but they may be less severe than my previous plates that protruded above the top of the carrier. I won’t know for sure until I expose and develop the plate tomorrow.

Cross your fingers.

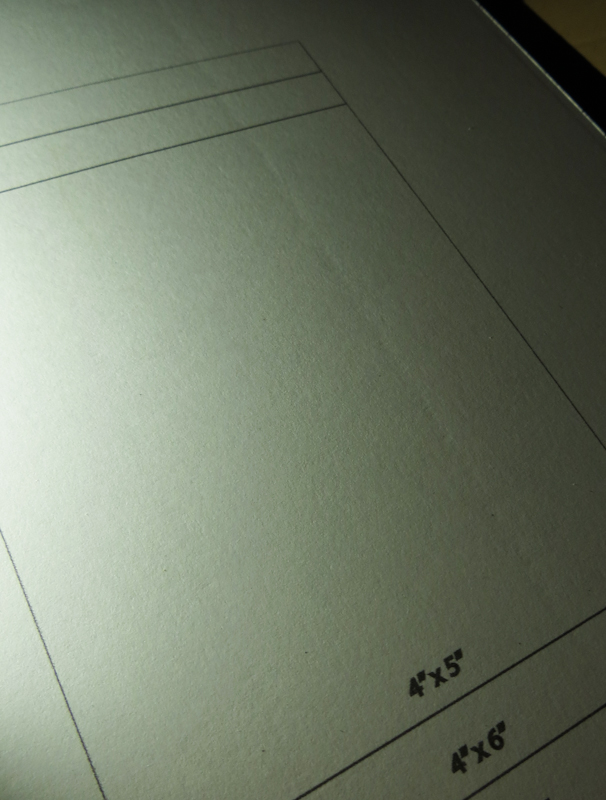
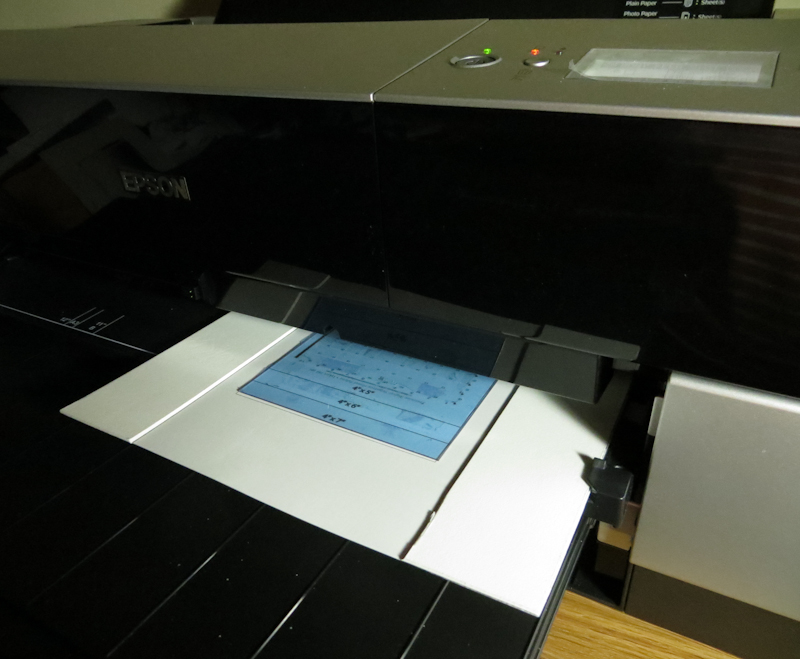
Just loading a piece of paper into the front feeder is enough to get tractor marks. In this image you can see a piece of 2-ply Bristol Vellum that was run through the front feeder on my Epson 3880. Note the diagonal groove running from the lower right corner to the upper middle. The printer makes these grooves, even if I load and then unload the paper without printing.

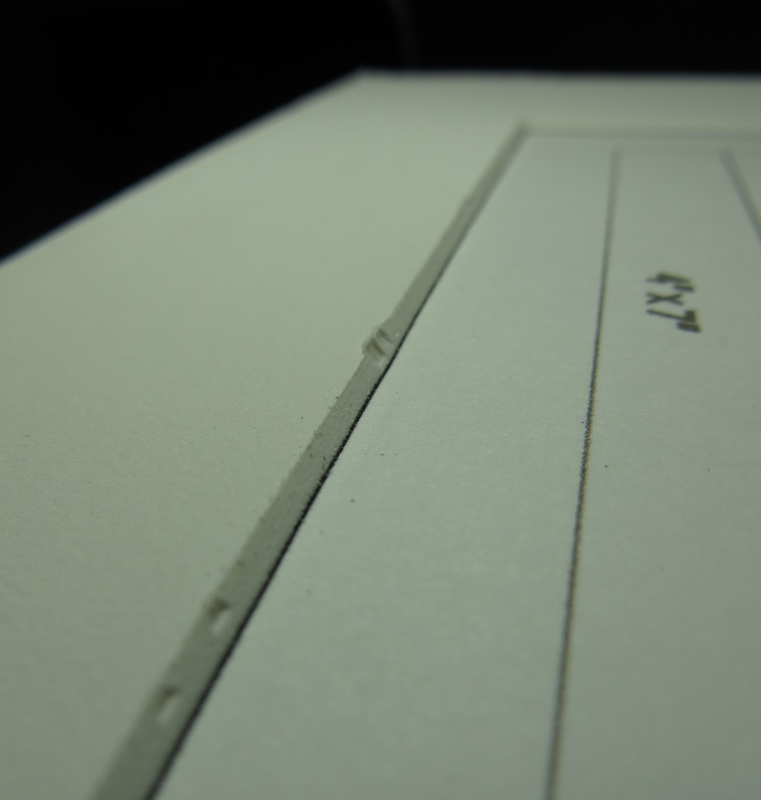
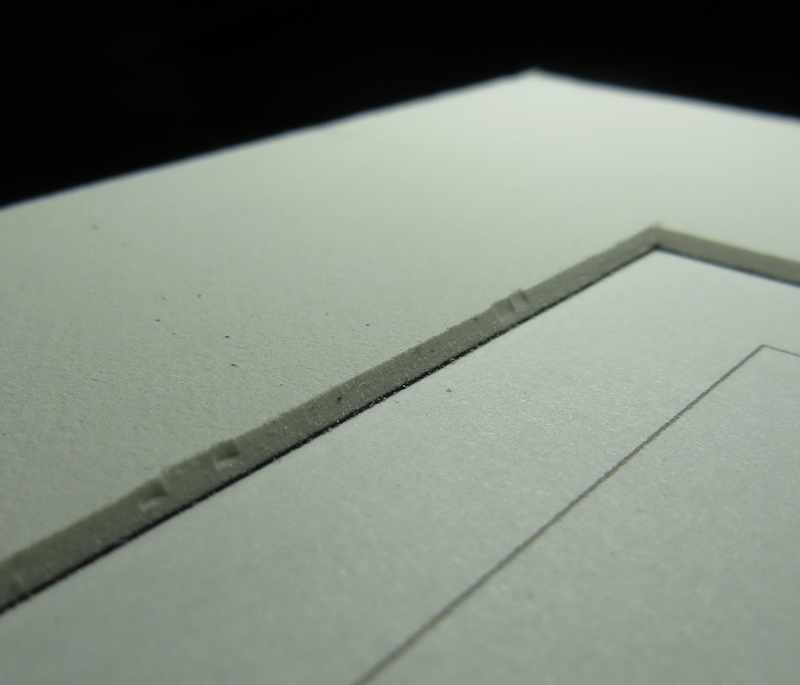
In an attempt to prevent the top drive wheels from touching the plate, I made a carrier with a piece of 4-ply mat board on top of a thin piece of Bristol Vellum. I could never get this carrier to load. It would always jam when the top rollers hit the edge of the mat board after traversing the inside of the window. You can see the dents and gouges caused by the rollers grinding into the edge of the window.

Here’s another view of the gouges. The interesting thing is that a window mat with no backing paper never jams, but the window mat with backing paper always jams. I also tried running the carrier with the piece I had cut from the window inserted back into its hole and it ran fine.

I was finally able to prevent jamming by making a carrier that is open on the bottom. Since the carrier doesn’t have an edge on the bottom of the window, the drive wheels don’t get stuck.

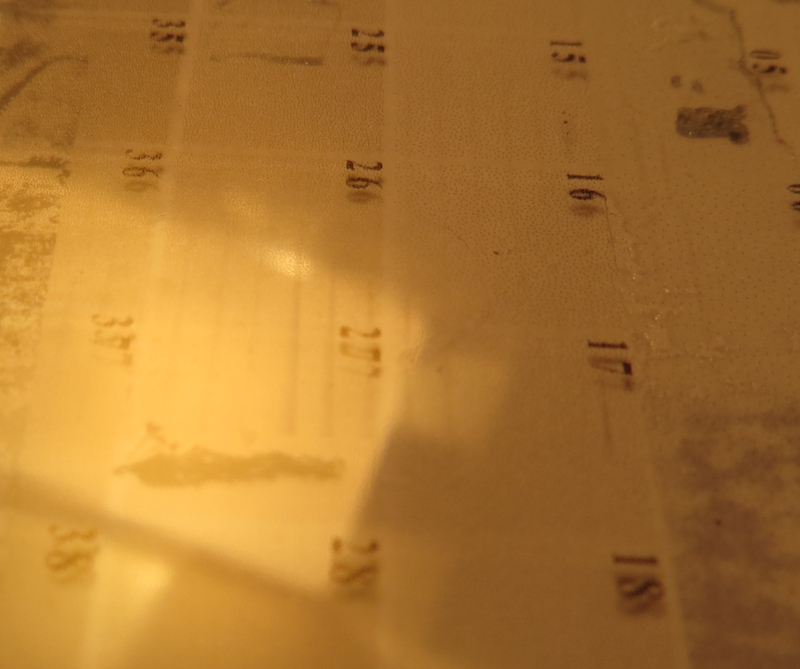
Here’s the plate I printed tonight with the new three-sided carrier. You can still see the tractor marks running vertically in the image, below the number 26.

The marks are more prominent in the darker parts of the plate, but at this point they seem less severe than the marks on my previous plates which protruded above the top of the carrier.

Here’s another angle of the same tractor marks. I need to let this plate dry overnight before exposing and developing, so I won’t know for another day whether I have reduced the marking to an acceptable level.

Good news, bad news

The good news is that I am not actually getting head strikes when printing directly to ImagOn plates. The bad news is that the top surface drive wheels on my Epson 3880 printer are leaving tracks in the ImagOn emulsion.

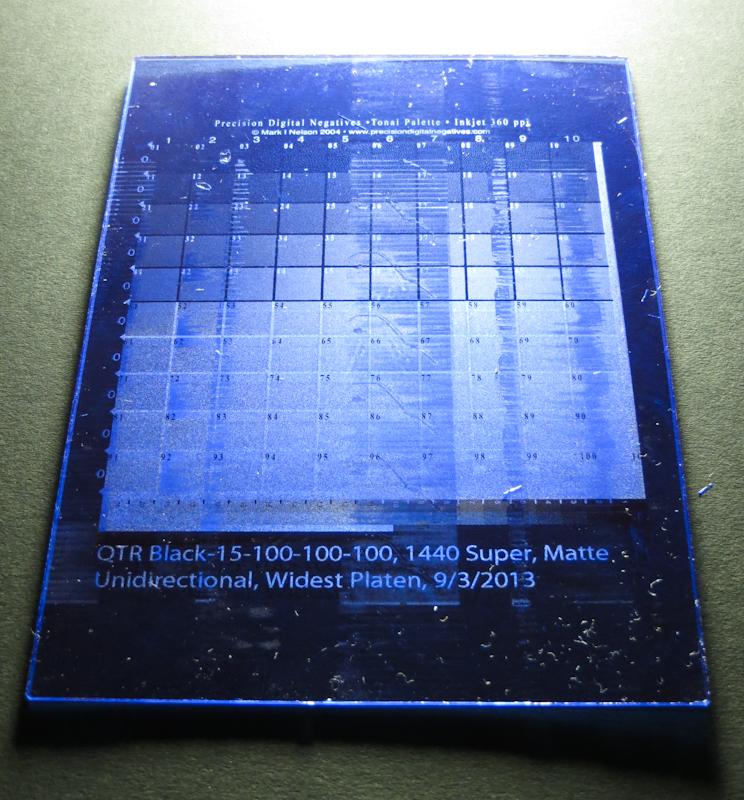
The photo below shows the problem. The worst wheel marks pass through the entire length of the plate, hitting steps 95-97 at the bottom all the way up through steps 5-7 at the top. The drive wheels also put enough sheer force on the emulsion to cause curved wrinkles like the one that passes through the center of step 75. Less severe tracks marks also appear on left and right sides of the plate.

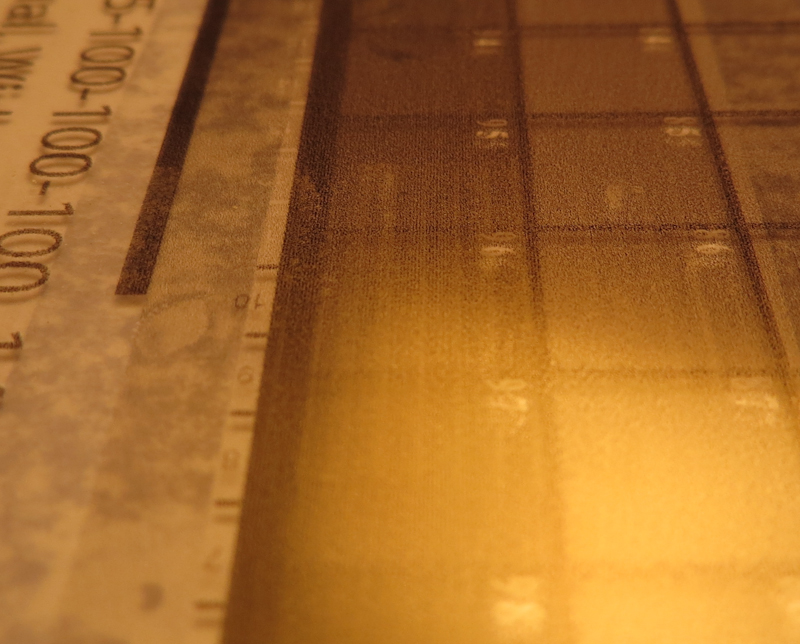
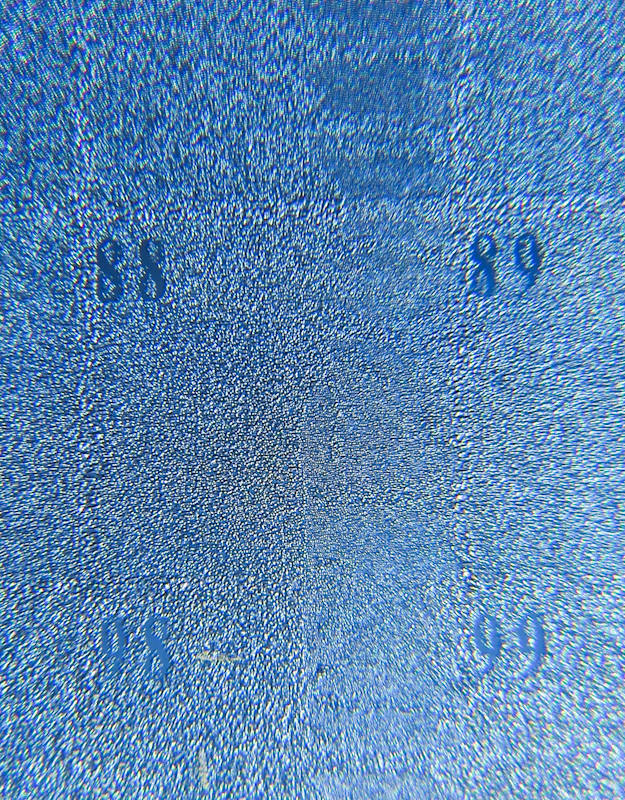
I was hoping these drive marks wouldn’t impact the quality of the matrix, but as with fingerprints, the marks seem to prevent the ink from adhering. Here’s a close up of the narrow track mark on the right side of the plate.

Here’s another close up of the big track mark in the center of the plate:

The impact of these track marks is unacceptable, so hopefully I can find a solution.

When I first saw the marks, I erroneously concluded that they were due to printer head strikes, and I was able to eliminate them by creating a carrier where the surface of the ImagOn was recessed below the surface of the surrounding window mat. It seems the reason the recessed carrier eliminated the marks is that it prevented the drive wheels from touching the recessed emulsion. The problem with the recessed carrier was that it was too thick to reliably pass through the printer’s front slot.

For the plate in this post, I modified the original carrier design in such a way that the plate was no longer recessed, but the carrier was only about 1mm thick. My hope was to make a carrier that was thin enough to feed reliably, and then use the “Widest” setting for the platen gap to eliminate what I thought were head strikes.

With this larger plate from the new carrier, it is now abundantly clear that the banding I’ve been seeing is due to contact with the drive wheels and not head strikes. I now have a few ideas about why I am getting track marks:

  1. It is possible that the ImagOn emulsion is so delicate that any contact between the drive wheels and the top of the plate will cause tracks. If this is the case, a thinner, recessed carrier may work, but I may have problems scaling it up to larger sizes because I will always need to leave enough border in the window mat so that there are enough drive wheels in contact with the mat to actually move the carrier through the printer. I might find that my 17″ wide print path needs a 3″ margin on either side, thus reducing my maximum plate width to 11″. If the ImagOn emulsion is really that delicate, one obvious question is how are others successfully doing ImagOn DTP? One thought is that they may be using a different model Epson printer. Some of the higher end printers, like the 4880, use a vacuum suction system so that there is no contact with the top of the print.
  2. I may have the paper thickness setting incorrect, causing the drive wheels to clamp down much harder than is necessary to move the carrier. Increasing the paper thickness setting might reduce the pressure enough to eliminate the track marks or reduce them to an acceptable level. My evidence for this theory is the wrinkles in the ImagOn. I know from trying to peel ImagOn off of a plate that the emulsion adheres pretty well, meaning that printer would have to generate enormous forces to cause the wrinkles. I don’t think I could make similar wrinkles on a dry plate with my fingernails.
  3. The design of my carrier, which allows the plate to protrude above the level of the window mat, may be causing the entire force of the drive wheels to hit the emulsion. Perhaps a carrier that put the top surface of the plate flush with the window would divert enough of the pressure to the window mat to reduce or eliminate the track marks.

Now I have another set of experiments ahead of me . . .

QTR Calibration

While sorting out my ImagOn plate carrier design, I have been working on calibrating QuadToneRIP for printing directly to ImagOn.

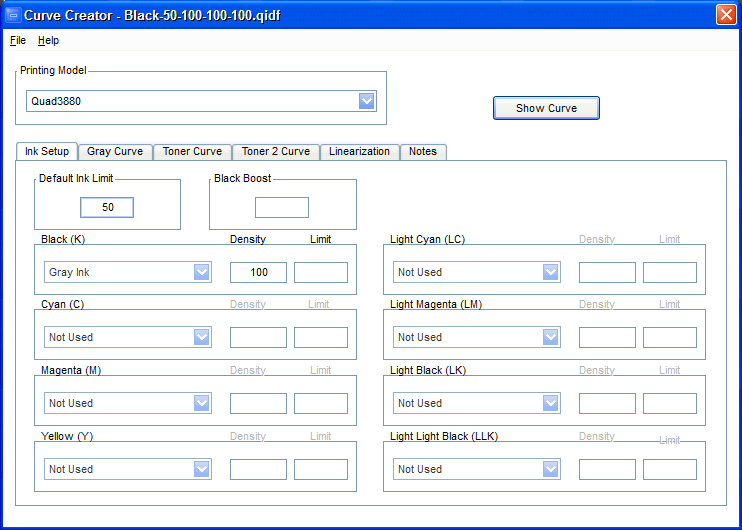
My earlier experiments were based on a custom curve that used only black ink. This initial curve was very basic, adjusting only the Ink Setup. I made no changes to the Gray Curve, Toner Curve , Toner Curve 2, and Linearization tabs.

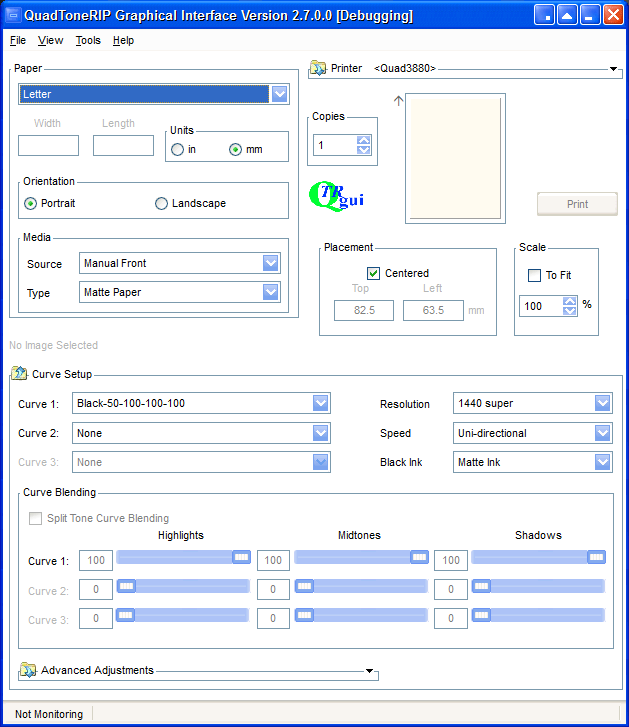
When printing I used the following settings:

  • Source: Manual Front
  • Type: Matte Paper
  • Curve 1: Black-50-100-100-100 (my .qidf file from above)
  • Resolution: 1440 Super
  • Speed: Uni-directional
  • Black Ink: Matte Ink

With these settings, I was able to print decent gradients, but I knew that my darkest steps were too dense. My plan for calibrating QTR is to first determine a Default Ink Limit value that will dither black portions of the image to the lowest dot density that yields a solid black in final the intaglio print. With this value nailed, I can then print out a step wedge to help me linearize the output.

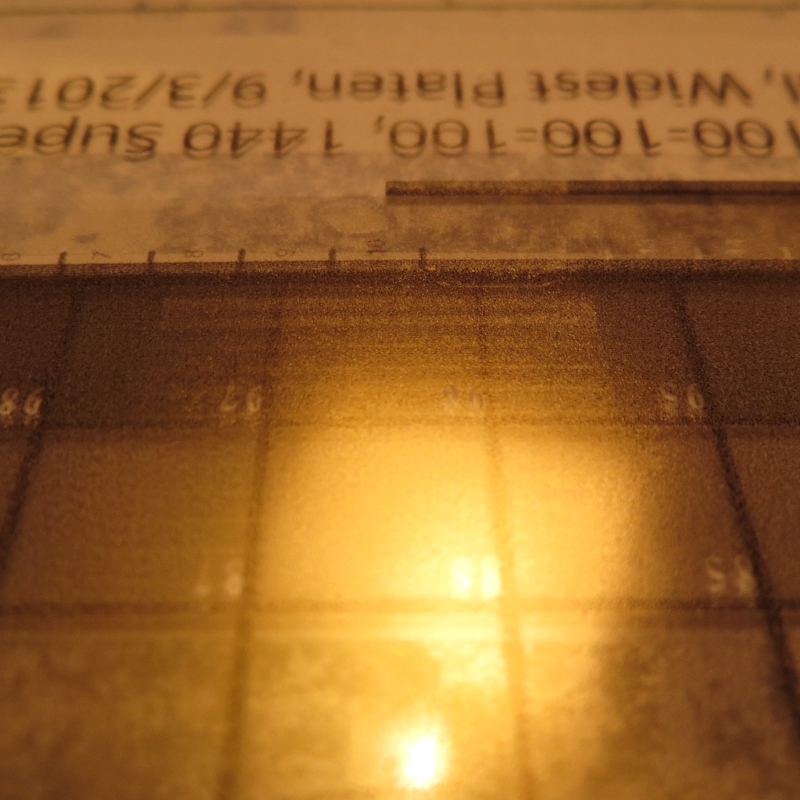
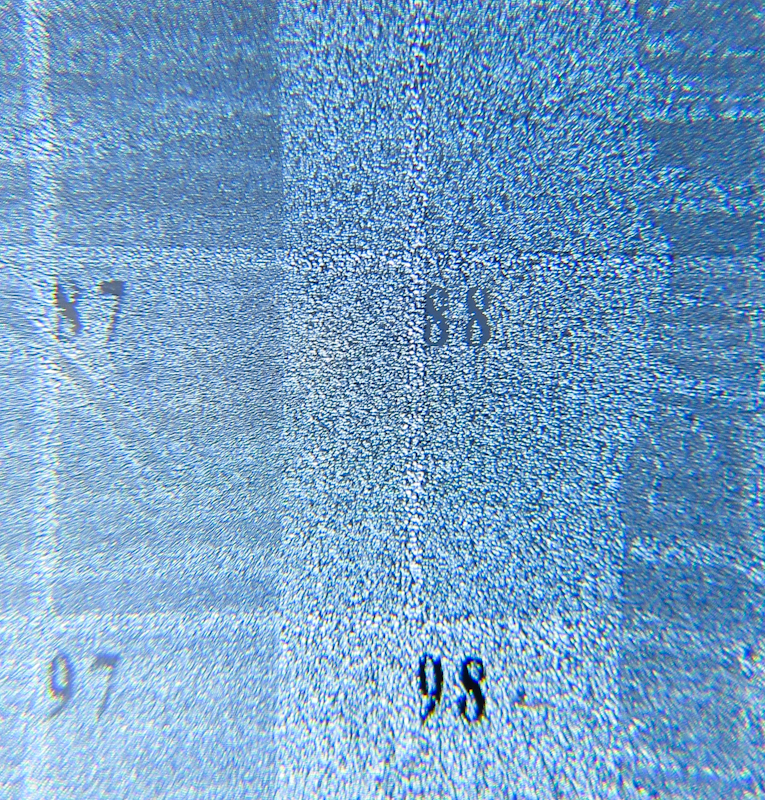
The picture below shows an unexposed plate that has just been printed with a 100-step wedge. The colors are skewed because the photo was taken under weak incandescent light to avoid exposing the plate. Clearly steps above 70 have too much ink. There is so much ink, in fact, that the individual dots are pooling together. Steps up to 60 look pretty good, and I would need greater magnification to judge the steps between 60 and 70. Even if these steps are well printed, they may still be too dense to prevent an open bite.

This experiment may look like a failure, but it is actually a success. Once I print this plate, I will be able to determine the first step that gives me solid black in the intaglio print and then I will use this knowledge to set a Default Ink Limit so that the darkest portions of the image never generate a dither pattern denser than the ideal first black step.

Scaling up

I’ve found time and again with printmaking that mastering a process at small scale is only half the battle. Scaling up alway brings new challenges. For example

  • Hand printing to etching press. I was making great linoleum block prints with a baren and then I tried it in the etching press and found I was back to square one because I didn’t know that I needed a stiff material between the rollers and the plate.
  • SolarPlate Relief Prints from 4″x5″ to 8″x10″. In the small scale, I was able to use stencils made from gouache on vellum. I found that the moisture in the gouache made vellum wrinkle too much at the larger scale and this prevented me from getting crisp edges during exposure. I eventually moved to paper stencils glued to glass.
  • Relief Prints from 8″x10″ to 24″x30″. It turns out it takes a lot longer to ink a complex design that is 30″ long. If you use water-based ink, it may dry before you are done inking, so an oil-based ink like Akua Intaglio is easier to use in the larger sizes. Small prints can be easily dried by pressing them. Large prints are harder. If you press them and don’t have some sort of forced air blower it may take a long time for all the moisture to wick away from the center. I finally ended up pinning my large prints to sheet rock.

Of course I forgot all of these challenges the other day when I finally created an ImageOn test strip that I liked. I thought all I would have to do is print out a 4″x6″ PDN Tonal Palette, make some adjustment curves for PhotoShop or QuadToneRip, and then I would be off to the races making 16″ x 32″ plates.

Turns out I was wrong. After making a new matboard carrier for the larger, 4″x6″ plates, I found that it wouldn’t feed through the front slot on the Epson 3880. A quick Bing search showed that lots of people on the internet have problems feeding odd materials through the front feeder. I considered a bunch of theories, including

  • Epson’s “check paper size” feature was failing because the carrier wasn’t exactly 8.5″ x 11″.
  • Epson’s “check paper size” was failing because the carrier’s edges weren’t completely square.
  • Some of the feed rollers couldn’t get a purchase on the material because they landed in the gaps between the matboard and the ImagOn.
  • The light sensor on the print head was falsely detecting the paper edge when encountering guidelines that I printed onto the bottom part of the carrier.
  • The light sensor on the print head was falsely detecting the paper edge when running across the edge of the window opening.

I tried disabling the “check paper size” feature and this allowed the carrier to load, but the image was printed about an inch higher on the page than expected.  After consulting the manual, I also found that Epson requires the “check paper size” be enabled when using the front feeder.

This evening I spent quite a bit of time examining my working carrier and my broken carrier to see if I could divine any difference, other than the window size. I then carefully constructed another carrier.

While conducting experiments with the new carrier, I came to the opinion that the problem may actually be the thickness of the carrier. My first two carriers were 2.5mm thick, which is 1mm thicker than allowed in the front slot. Since the first carrier worked, I assumed that Epson left a little leeway in this specification. After a number of experiments, though, I suspect that the drive wheels sometimes can’t push the 2.5mm carriers through. My guess is that the larger carrier bows just a bit more around the window edge and this causes it to get hung up.

My main evidence for this theory is

  1. The carrier would stop moving, but I would hear the rollers slipping against the paper for 30 seconds or so before the printer gave up.
  2. I seem to be able to reliably load 1.5mm window mats of various dimensions when I leave off the backing paper.

My plans, moving forward are to reexamine the thinner carriers. I had moved away from the thinner carriers because I suspected they were leading to printer head strikes where the ImagOn protruded above the surface of the carrier.

In retrospect, I am not confident that I had the platen gap set correctly. I had set it in the Epson driver, but I noticed from time to time that it would get reset to “Standard” gap. I also realized that QuadToneRip can’t set the platen gap, so it must be set from the printer’s control panel. With this in mind, I want to do some more tests with the thinner carriers, using the “Widest” platen gap setting from the control panel.